Mercedes-Benz Forum banner

How do I replace the main top lift and top load assist hydraulic cylinders?

12K views 21 replies 6 participants last post by  TheSenorJuan  
#1 ·
How do I replace the main top lift and top load assist hydraulic cylinders?

I already have the trunk panels removed. So, I can remove and reattach the hydraulic lines to the pump. Can I just remove the rearmost interior side panels? Or, do I need to remove the rear-most black interior panels above the cylinder, rear of and above the door latches?

See this diagram for cylinder locations:

Complete Set Mercedes R230 SL Rebuilt Cylinders
 
#2 ·
It looks like the top needs to be up to remove the main lift/top drive cylinder.


It looks like the top needs to be down to pull the clip off the front pin. If I push that pin out all the way, I can easily drop that front pin into an inaccessible hole. Do I need to partially remove the pin so it stays in on one side, and drop the cylinder down?

In the load assist position, I can see the rear pin clip. Do I pull the clip off, raise the top, and pull the rear pin out? Then pull the cylinder back and out?

See pictures.
It is dauntingly tight in there. I am concerned if I remove the cylinder, and change the top up or down, pieces will move out of alignment. I can drop a pin or clip, and lose access to it, etc. I need a stepwise procedure.

Thanks,
Thom
 

Attachments

#3 ·
How do I replace the Load Assist cylinders? The bottom pin is down in that inaccessible hole behind a sheet metal wall and the roll bar cylinder? It looks like I have to pull the entire top lift mechanism.

I swapped out the main lift/top drive cylinder mostly with the top up. You can access the clips and pins in the top up position. I removed the black rearmost side interior panel, the frame member beneath and the b pillar silver cap that holds 4 or 5 torx retainer screws.
 
#5 ·
You must remove the silver plate 4-5 torx screws behind the door that holds the rearmost side vinyl panel. Remove the vinyl panel. Remove the cylinder with the top up; to replace a main lift aka top drive cylinder.

The load assist cylinder is forward and below the front pin on the main lift cylinder. Top Hydraulics said something like remove the roll bar cylinder to get to it. I hope it does not leak.
 
#7 ·
Cool. Please post the MB instruction for removing the roll bar support elements; and anything helpful you find out about the load assist and roll bar cylinder removals.
 
  • Like
Reactions: Riggmaster
#12 ·
Nope... the top quit working without heavy lifting assist par moi after I replaced most cylinders rear of load assist. I wonder if other seals are blown, hydraulic fluid is fouling electrical connections, I switched line connections, etc. The roll bar popped up, and won't move via the switch.

You might video or photograph your progress to help us out.
 
#13 ·
Did you remove the roll bar cylinders to get access to the load assist cylinders. I haven't started on the removal yet but from my understanding they are the most difficult to remove. Mine are definitely leaking on both sides. I can see the oil pooled at the top of the seal. I will let you know how it goes for me.
 
#14 ·
It looks like above that Riggmaster removed roll bar support elements, and roll bar cylinders. He posted how to .pdfs above.
 
#16 ·
I finally got around to working removing the load assist cylinders. It isn’t too bad but requires removing all of the interior and trunk panels and the roll bar cylinders to be able to get to the lower bolt on the load assist cylinder.

This guy has the only video I could find detailing how to remove it the roll bar cylinder.

In short below are the steps.

1) with top up remove all carpeting and paneling in the trunk. You will need this removed to get the lines out once unhooked at the pump.

2) Lower the top and remove all of the interior paneling in the backseat and around the roll bar. You will inevitably break some old plastic pieces. If your top isn’t working at all you will need to put the trunk in service mode and manually open it.

3) Remove the roll bar cylinder like in the video above. On the driver side I removed the 18mm bolt that goes through the roll bar pivot. I could not get it to compress because it is attached to a shock absorber. This is tedious due to the space.

4) With the roll bar cylinders removed you can pull out a rubber grommet that gives you access to the bottom bolt of the load assist cylinder. You will need to remove some metal plates up top so that you slip out the top pin holding the cylinder in and to have clearance to pull the cylinder up and out. It is straight forward to remove the

5) from here you cut all of the zip ties and pull the lines out.

When I go to reassemble it I will try to take some pictures. If you are stuck send me a message and I would be happy to call you and go over how I got them out.
Neil
 
#17 ·
I finally swapped out the LOAD ASSIST cylinders. The trick is to move the roof panel back until the upper pin going through the load assist cylinder raises high enough to push it inboard. Check that you have clearance to push the pin before you do anything else.

You must remove the panels above the load assist cylinder at the rear quarter window to access that upper pin. Raise the rollbar for pin clearance. Then move the vario roof rearward for the pin to clear when pushed inboard. I use a pair of needle nose hemostats to remove the pin’s gold clip.

If you can’t get that upper pin pushed inboard enough to pull the clevis on top of the cylinder rod forward, you may need to remove the interfering panels.

To remove the lower torx 30 bolt/screw that goes through the bottom of the load assist cylinder: Raise the rollbar. Remove 3 bolts per rollbar support assembly – 1 bolt at the top of the support assembly that connects to the rollbar.; 2 bolts at the bottom. Disconnect the wire from the right support assembly. Remove the right and/or left support assemblies to expose the rubber plug covering the entryway hole to the torx 30 bottom bolt.

With the upper pin disconnected, and top of the cylinder rod loose and pulled forward, I push the roof forward, which loosely compresses the cylinder. I unscrew the bottom bolt most of the way, and insert a magnet on a stick to pull the bolt out. You now can pull the cylinder forward from above and lift it out.

Push the only hydraulic new hose back along the path of the original old hose, and connect it at the hydraulic pump.

Drop the bottom of the new hydraulic load assist cylinder into it’s hole. Loosely tighten the torx 30 bottom bolt. Push the top clevis into position to reinsert the top pin. If needed, pull the top rearward to raise the upper pin hole. Insert the upper pin, and secure it with the gold clip. Tighten the lower bolt.

Image
Image


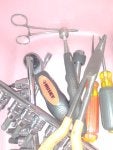
Above you see tools I used including the needle nose hemostats stuck to the magnet on a stick.
 

Attachments

#19 ·
Welcome to the forum @nikod - please take a moment to read the information on the links below. It explains how to use the forums and update your user profile so that your car's details and your location appear on each post below your avatar. This is good information for others to know when trying to help. It also has good information about how the forums are organized and how to use the search feature:

Find your Forum Section, Navigate & Search

Complete your profile.
 
#20 ·
I'm in the process of replacing the main top lift, lift assist, roll bar and left lock pawl cylinders. I am making videos of the replacement. The videos are focused on the main top lift and lift assist cylinders as I couldn't find videos on those subjects. There are videos available on replacing the other cylinders (top lock, roll bar, lock pawl, trunk lock and trunk lift).
I have included links to those videos in the comments of my "Part 1" video.

So far, I have only completed the disassembly process. I'm waiting on the new cylinder from Top Hydraulics. I will post videos of the install when that process is finished. I hope you find these videos helpful. I think between my videos and the videos linked in the comments of my “Part 1” video all 11 cylinders are covered.


Lift Assist - Part 1

Lift Assist- Part 2