Mercedes-Benz Forum banner
101 - 120 of 169 Posts
2009 Driver Rear Window Lift Rebuild and Installation

10/02/2018
Once receiving the rebuild kit from Ebay, which consisted of one new motor drive pulley, new slide block, new slide block springs, and two cables of different lengths.


1 Place Lift motor side up, Top position to your left side (for reference to pics) with glass lift all the way in the up position (see Pic).
The forum here has been so helpful and I really couldn’t have done this without all the members help and pics here. I’ll ad some pics that I felt were really important to tackle a rebuild of the window lift mechanism vs. just buying a new replacement lift. Some members already posted some of these but the more the better. The following is my procedure and what worked for me.

2 Disassemble all the old broken cables, drive wheel from Motor and slide block from Window Lift Bracket. Clean all parts.


3 With lift in Top Position install new cables as shown in next pics. Left-Top cable (longer one) gets wrapped around drive wheel from top of drive wheel as shown in pic, Right-Lower Cable (shorter one) gets wrapped around drive wheel from bottom of drive wheel as shown in pic. Take your time and relax as it can be a bit tricky.

4 Note: You will need to wrap the cables onto the Drive Pulley with the motor unbolted and away from the pulley. Because the new cables were very tight to go around the drive pulley and the upper and lower intermediate pulleys. I brought the drive pulley in my hand away from the motor mounting area inwards to the loosest point along with using the previous posters method of using the “Cam Action” of the idler pulleys ( to start the cables ) to give more slack in the assembly. Once I had all the cables in place on their respective pulleys I had to force the drive pulley/cable assembly while holding the cables in place over to the Drive Motor mounting point and stretch everything into that point and seat the drive pulley between the 3 small tabs that will capture the drive Pulley. After this you can install the Drive Motor onto the Drive Pulley and use the 3 torx screws with new Loctite and bolt it down.

5 Now you’re ready to install into the car.
Note: In my case I could not get the whole assembly into the quarter panel in the top position as I did not want to remove the “Bottom Window Tilt Adjuster” which was causing interference. I didn’t want to alter all the adjustments that were already in place. To do this I positioned the lift mechanism in the car, plugged it into the harness and used the window switch to bring it to the bottom position. Once in place and bolted in you will need to raise the lift into the upper area to be able to bolt in the 3 bolts that secure the quarter Glass. Since I didn’t change any of my original adjustments I simply bolted the glass in loosely brought up the glass assembly to the closed position and let the glass bracket hit its stops (you can see these stops behind the other side of the assembly. There are two white plastic ones for the Top Position and one black rubber one at the bottom of the lift bracket that stops the glass bracket at the bottom of its travel in the down position. When the window bracket is at it top position with the glass bolts loose and the front door closed and the window up you will need to bring up the rear quarter glass up and forward to all seals, hold it there snugly and tape the glass to the roof and front glass. Go around to the passenger side into the back seat area and tighten the 3 screws securing the glass with the proper torque to the factory specs. Check for proper operation up and down a few times then go for initial test drive listening for leaks at the quarter glass sealing locations. If all is well go on to final interior assembly. Thanks to all the forum members before me posting all their experiences and great information! Cheers………!!
 

Attachments

I will be needing to perform this DIY but am having trouble with unclipping the seat belt extender by pressing the catch hook. How exactly do you access the catch hook? I pulled out the extender but don't see the hook.

Could anyone elaborate on this step? Thanks in advance.
Poke a small screwdriver up the hole in the underside of the arm. Pull the arm out first.
Position the screwdriver towards the rear and push it up while holding the arm to stop it snapping back in. Having a helper holding the arm makes it easier.
 
Thanks again to keyhole for posting the WIS, and everyone else who has contributed their knowledge to this thread.
Today I replaced the left rear regulator/lift mechanism in my CLK55 coupe. The window would not move and I could hear the cable flapping.
I found the procedure to be as per the WIS, that is,,you DO need to remove the upper side panelling,the seat belt top anchor point, the seat belt extender,the inner rubber sealing rail/trim , the inner panel, the window glass, the exterior quarter panel body side moulding and then of course,,,the regulator.

You do NOT need to remove the seat base, the lower side panel and the C pillar trim. You don't even need to tape the glass.
The lower adjuster bolt is accessed from outside the car.
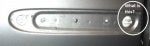
The only tricky bolt to access is the inner panel lower rear bolt , but if you insert a small T30 bit into the head, then use a spanner at a right angle to turn it, it can be removed without removing the C pillar trim.

The old regulator had a failure due to the slide block cracking into pieces,,I replaced the whole regulator unit with a used part.
The mechanism needs to be manually pushed down or lowered using the switch to enable the glass to come up and out towards the outside.
The regulator is held in place by two nuts at the top ,and one adjuster nut at the bottom which is accessed from outside.
I measured the protrusion of the adjuster ,30mm from bracket to flange , and set the new part to be the same.
I then placed it in the car and tightened the bolts,,,you need the mechanism to be at least half way down to be able to get it in easily. Connect the electrical connector.
Then place the glass in and sit it on the stops and raise the mechanism, then loosely fit the three bolts.
Use the switch to raise the glass as high as possible ,then use your hands to push the glass up firmly into the groove above the window ,and tighten the bolts.
Check the movement ,,to my surprise I needed no further adjustment .

Fully lower the window to enable fitment of the rubber sealing rail, making sure it is positioned fully to the rear.( I marked it with a marker pen before removal ).
Then put all the other bits back together. I replaced the inner panel lower rear bolt with a hex head bolt to make it easier to tighten and for if I ever have to do this again...Hopefully not..
It took about three hours all up ,, good to have a correctly functioning window again.
 

Attachments

Stuck at Step 9 (Benzyle's Post #61)

Hello,

I have a 2004 CLK 500 with Right Rear Window Regulator problem.

With the excellent help and encouragement from this forum, I have been able to proceed up to Step 9 as per Benzyle's Post #61.
At this step I am supposed to raise the window up; but since the window is stuck and it is right at the bottom, I don't know how to proceed.

In the next step 10, I am supposed to remove the insulation; is it the black sponge stuffed between the lower and upper inside panel (just under the belt in the attached image).

Please advise.

Thanks,

Frank.
 

Attachments

Hi Frank ,
Easy part first , the insulation is above the seat belt reel. You peel it back to expose two of the window securing bolts. The other is behind the grommet just to the rear,,,when the window is up.
From the photo, I think you still need to remove the top sealing rail , which is the rubber seal that runs horizontally at the top.
With that out of the way , you can look down and see the 3 bolts with the white washers that hold the glass.
Maybe you can grab the glass and pull it up ? Try sort of jolting it around a little and then pull it up.
If not , maybe you can reach the bolts some other way ? Remove the inner panel to get more access.
If all that fails , you may have to try and unbolt the regulator with the window still attached, and then move it around and hopefully get access to the window bolts.
If you can't get to the bolts and the window is still stuck down , you could try cutting the cables if you can reach them somehow ,,that should enable you to get the slide block mechanism to move and the window to come up.
You will be replacing the cables anyway.
 
Removed insulation

Thanks Benzyle.

I was able to peel the insulation. Started from the top but it started breaking off. So removed it (partially) from the bottom and that was much easier.

Now I see 3 possible bolts behind the 3 circular black covers - picture attached.

The top sealing rail is now seen towards the left of the above 3 bolts. The sealing rail is in the shape of a "V" where I have only removed the right half and this is what is now hanging at an angle as seen in the attached picture - and resting on the folded insulation - which is still attached at the top end.

Hesitant in removing the left half - but will do that tomorrow morning.

Will keep you all posted.
Thanks

Frank
 

Attachments

You only need to remove the sealing rail from the inside edge ,you can leave the outside part in place as per my last photo on post #108.
When your window is down , the bolts will not be located behind the grommets or circular black covers. They will be lower down , so somehow you need to manhandle the window up.
 
Removed Inner Panel

It was a challenge to remove the inner panel. Without Benzyles notes in Post #107 removal of the tricky bolt would have been very difficult.
Bolt2 is also too close to the airbag.

After removing the inner panel, I can now see the 3 bolts on the glass with white washers.
When I pulled the button up to raise the window, there was no response whatsoever. (while someone helped to manually pull the glass up)
When the button was pressed down, there was noise of cables flapping, so the motor is working.
But I cannot manually move the glass even a little bit.

So, I will have to do as Benzyle suggested in the previous post.

Note that while removing the inner panel, the glass was scratched a tiny little bit in spite of my being very careful. So, I will be placing a cardboard between the glass and the inner panel during reassembly.

I am still not sure where the 2 bolts are which hold the regulator to the chassis. The third bolt is the adjuster nut which is supposed to be accessed from the outside trim which is hard to remove ( I need to work on it again). In the attached picture, when I remove the black cover from the grommets, I can see Nut 1 and Nut 2 which is behind the glass; but I dont see any bolts.

Thanks

Frank.
 

Attachments

Hi Frank , very unfortunate that you cannot move the window,even manually.
Best option ,,,if there is any way you can get onto the three 10mm bolts with the white washers and take them out ,then you could remove the glass.
Otherwise , the regulator is held to the chassis by a 13mm nut (not a bolt ) in each top corner which goes onto a threaded stud which protrudes from the chassis.
You can see the rear one in my 3rd photo-post 107. You can see the front one in 4th photo post 108, behind the circular hole in the window.

The lower adjuster nut which holds the bottom corner of the regulator in place is behind the exterior moulding, use two wide plastic trim tools at the same time to lever the moulding out and it will come away without too much trouble. Loosen the nut and use pliars or a magnet to remove it out so that you don't drop it.

Good luck.
 
Making progress

Thanks Benzyle.

Yes, I can now see both "nuts" (in broad daylight) on the regulator through the glass (which was not visible late last night).

Yes the only option is to remove the 3 bolts on the glass. Can see but cannot touch.

Will have to either get a very long spanner/tool and wrap it up in cloth and then try to remove the nuts - to protect the plastic tinted coating on the inner side of glass.

Looks difficult but doable - because of this forum. (In spite of the constant pressure of simply paying them the money and getting it fixed)

My problem was that I just couldn't see the regulator - so I did not even order any repair kits until today.

Hopefully the glass should be out before the kit comes in.

(Murphy's law in full effect: Heavy rains only when my window is in trouble - in San Diego where sunshine dominates over rains)
 
Perhaps a long handled , flexible head , ratcheting wrench 10 mm , will be best , you may have to get creative , or find someone with really skinny double jointed arms and small hands to help....joke.
Even if you drop the bolts , it is possible to retrieve them from the bottom of the cavity after you have removed the regulator using a magnet or a gum on the end of a wire or stick.
When replacing the inner panel , you can have the window up so it won't get scratched.
 
Got the Glass and Regulator out

It was a challenge to remove the glass. Were it not for this forum, I would have given it up. Thanks to all.

As per Benzyle's suggestion I tried to jolt the glass and pull it up. After several attempts I was finally able to move it up by 3 inches.

This helped a lot - but even if the glass did not move, it is still possible to loosen the nuts on the glass with a small adjustable wrench tied to a 15-20 inch stick.

Created a long-handle tool (looks like a stone-age tool, but worked great!!!) to loosen the 3 nuts on the glass. What helped was to tie a red Sharpie marker at the end of the stick and color one side of the nut. This way you can tell if the nut has moved. It is very challenging to grab the nut in the first place particularly the bottomost one. And the stick keeps falling inside. So, a long rope attached to the stick helps to pull it out. Also tape a flash light on the top end such that it doesnt come in the way of the long stick and it focuses on the red dot of the nut.

Once the 3 nuts are loosened, just one turn or so, use the other end of the stick to loosen it all the way till you can hit it and let it fall at the bottom along with its washer. (Maybe its obvious, but the rubber-bands at the end of the stick when rubbed against the nut in the upwards direction loosens the nuts very easily). The magnet at the end of the stone-age tool worked great in getting the nuts out- with the washers still attached.

Once the glass is out, the connector to the motor can be easily unplugged before removing the regulator - picture attached

Removing the exterior moulding was difficult. Inserting a credit card (expired one) prior to inserting the prying tool helped. There are 3 clips in the middle and that's where pressure needs to be applied. These break off and I think they will have to be replaced.

Again, as per Benzyle's suggestion it was very important to grab the third and the last nut that holds the regulator to the chassis before if fell inside.
There is a hole at the bottom from where it would be almost impossible to recover.

Attached is the picture of the regulator after the inner panel and the glass is removed as well as the top nuts.

During all of this, the battery has not been disconnected. Not sure if this is OK.

Still have a long way to go and look forward to continued help.

Thanks
 

Attachments

Well done Frank, I reckon you have done the hardest part ,,,nice stone age tool ,,,all fairly easy from here on.
Fitting the new pulley and cables is a little tricky but if you follow the guides above from Sker66 it is not impossible at all. Use the cam action on the pulleys to enable the cables to fit and install the main pulley. Then just rotate the cams/idler pulleys and the cable slips down into the groove. Fit the cable ends into the slide block first , be sure to position them so the cables feed out correctly.
Leaving the battery connected is fine ,,and it allows you to test the mechanism as soon as you put it into the car and then adjust the height as you need it.
Follow my guide in post #107 to refit the window and you should have no trouble. Window bolts are 9Nm.
re your photo ,,it is part of the clip which has stayed in the car instead of coming away with the moulding , try to separate it and fit it back onto the moulding like the other clips.
 
Task Accomplished

So, it was the slide block which was broken and which resulted in one of the cables getting entangled on the pulley.
I finally completed the installation of the window regulator after replacing the cables, the pulley and the slide block (kit from eBay).
Thanks to Keyhole for starting this thread, to Benzyle for continued support and to all the other contributors.

I noted that the broken slide block was loaded with white grease (including the insides of the springs).
While tightening the bolt on the slide-block with T25 Torx bit, it helps to hold the other end with another T25 bit.
On the slide block there were 2 rubber/silicone washers which were cracked. I could not replace these - but I am sure a 15 mm circle cut from a flat 2 mm thick silicone/rubber sheet would have worked.

As per Rudeney’s suggestion, I applied white lithium grease on both sides of the 3 tracks and this has made the regulator very smooth and quiet. (However, this made the whole regulator slippery and it was difficult to place it inside).
There were too many nuts and bolts to deal with and keeping track of them was difficult. Attached is a picture of all of them.
Thanks once again to all of you. Now I am well-prepared for any regulator……
 

Attachments

101 - 120 of 169 Posts