The K1 Kit Page
2/3 Upshift Flare Repair
This is a fix for transmission slip/flare on 2-3 upshift at partial load for 722.3,722.4 and 722.5 automatic transmission
If your automatic transmission shifts fine with the exception of a flare on the shift up from 2nd to 3rd, and you've exhausted all your adjustment options, then the K1 Accumulator Spring Kit might be the solution.
![Image]()
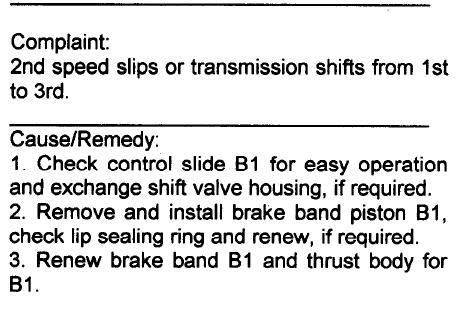
The K1 spring kit,(part number 126 270 44 77) will cost you less than $10 for the 722.3 722.4 722.5 automatic transmission, that can be purchased from MB (via fastlane).The Kit is a drop in replacement for the K1 accumulator's spring/piston assembly in your transmission's valve body.
![Image]()
Use a 1/2”->3/8” and a 3/8”->1/2” adapters to create a short extension unless you have a real short extention. The extension is needed because the bolt is recessed pretty deeply in the pulley, but you don't want more extension because there isn't much clearance between the radiator and the pulley. These two adapters give just enough extension to reach the nut without there being much risk of banging into the back of the radiator.
Reach up from underneath, slip the socket on the nut, and rotate away. The handle is an 18” breaker bar for the leverage – more would make it easier, less and you'd need to be a gorilla to turn the engine. The socket is a 26mm. Turn only in the normal direction of rotation when the engine is running -- when facing the engine, the bolt turns clockwise.
![Image]()
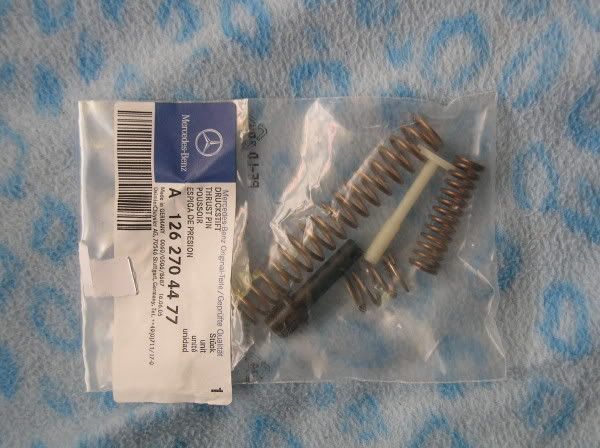
You need to rotate the engine until the torque converter drain plug is accessible through this little hole in the bell housing of the transmission. When turning the engine, turn just a little bit each time (~10 degrees) so you'll be able to see the plug before you rotate it past the access hole. Turn much more and you're likely rotate it past the the access port and have to go all the way around again. The plug takes a 5mm allen socket.
![Image]()
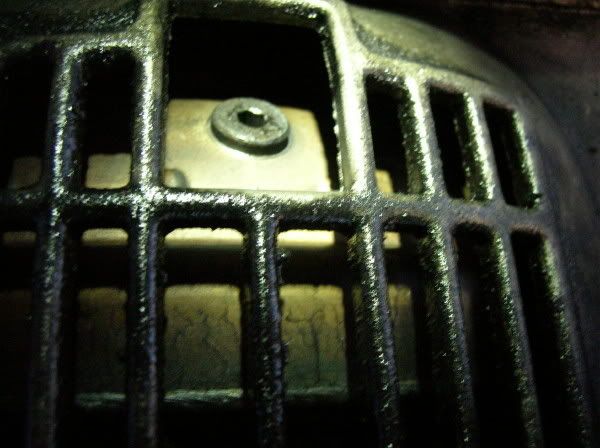
A closeup of the transmission pan drain plug. (see the picture of the removed pan below).
![Image]()
The 5mm allen socket needed for the torque converter and transmission pan drain plugs.
![Image]()
The transmission pan has six 13mm bolts holding it to the transmission. To get to the location where the spring kit goes, it must be removed. As long as the pan is down, might as well go ahead and change the filter too.
![Image]()
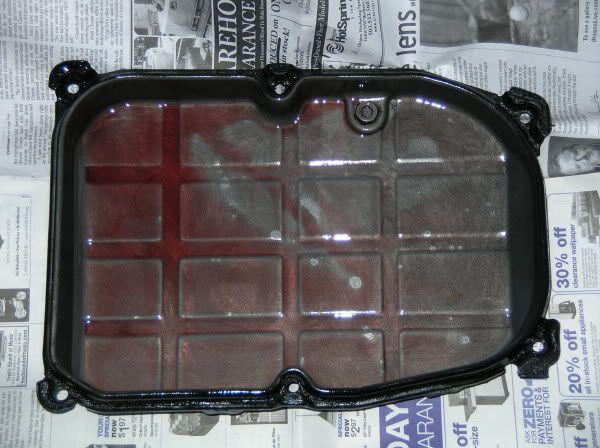
Drop the pan and this is what you see. This shot is facing toward the rear of the car. The front of the transmission valve body has all these metal plates. We'll be removing the one on the lower Right of this picture and replacing some parts inside it. Notice that it is held in by four straight-edge, round-headed screws.. an offset screwdriver will do nicely here as they are torqued fairly tightly. Interesting tidbit, on the left edge of the valve body one can see the transmission dipstick just sticking down.. normally it sticks down further. It is slightly pulled out in case it needed to allow air into the system to help it drain.
![Image]()
Here's the offset screwdriver used on the valve cover place and filter screws. Given the clearance, some form of offset or stubby screwdriver is required, but the extra leverage of an offset was definitely worthwhile as the screws are torqued fairly tight. Others have cobbled together an effective offset screwdriver using a small ratchet and socket that a screwdriver bit fits into.
2/3 Upshift Flare Repair
This is a fix for transmission slip/flare on 2-3 upshift at partial load for 722.3,722.4 and 722.5 automatic transmission
If your automatic transmission shifts fine with the exception of a flare on the shift up from 2nd to 3rd, and you've exhausted all your adjustment options, then the K1 Accumulator Spring Kit might be the solution.
The K1 spring kit,(part number 126 270 44 77) will cost you less than $10 for the 722.3 722.4 722.5 automatic transmission, that can be purchased from MB (via fastlane).The Kit is a drop in replacement for the K1 accumulator's spring/piston assembly in your transmission's valve body.

Use a 1/2”->3/8” and a 3/8”->1/2” adapters to create a short extension unless you have a real short extention. The extension is needed because the bolt is recessed pretty deeply in the pulley, but you don't want more extension because there isn't much clearance between the radiator and the pulley. These two adapters give just enough extension to reach the nut without there being much risk of banging into the back of the radiator.
Reach up from underneath, slip the socket on the nut, and rotate away. The handle is an 18” breaker bar for the leverage – more would make it easier, less and you'd need to be a gorilla to turn the engine. The socket is a 26mm. Turn only in the normal direction of rotation when the engine is running -- when facing the engine, the bolt turns clockwise.
You need to rotate the engine until the torque converter drain plug is accessible through this little hole in the bell housing of the transmission. When turning the engine, turn just a little bit each time (~10 degrees) so you'll be able to see the plug before you rotate it past the access hole. Turn much more and you're likely rotate it past the the access port and have to go all the way around again. The plug takes a 5mm allen socket.

A closeup of the transmission pan drain plug. (see the picture of the removed pan below).

The 5mm allen socket needed for the torque converter and transmission pan drain plugs.
The transmission pan has six 13mm bolts holding it to the transmission. To get to the location where the spring kit goes, it must be removed. As long as the pan is down, might as well go ahead and change the filter too.

Drop the pan and this is what you see. This shot is facing toward the rear of the car. The front of the transmission valve body has all these metal plates. We'll be removing the one on the lower Right of this picture and replacing some parts inside it. Notice that it is held in by four straight-edge, round-headed screws.. an offset screwdriver will do nicely here as they are torqued fairly tightly. Interesting tidbit, on the left edge of the valve body one can see the transmission dipstick just sticking down.. normally it sticks down further. It is slightly pulled out in case it needed to allow air into the system to help it drain.

Here's the offset screwdriver used on the valve cover place and filter screws. Given the clearance, some form of offset or stubby screwdriver is required, but the extra leverage of an offset was definitely worthwhile as the screws are torqued fairly tight. Others have cobbled together an effective offset screwdriver using a small ratchet and socket that a screwdriver bit fits into.