Mercedes-Benz Forum banner

380SL - how do you remove AC compressor ...

26K views 30 replies 10 participants last post by  cwmoser  
#1 ·
The rear seal in the AC compressor in my 1983 380SL has a freon leak.
Took it to the shop and they used their black light to determine that
the AC compressor needs replacing.

I was wondering what is the process to remove/replace the AC compressor
and how many shop hours does it take?

Carl
 
#3 ·
Are you having Samson and Delilah trailered down to GSO?
Those cars are very unique.
Like to drop by when you get settled and meet you.

Carl
 
#4 ·
85 compressor replacement steps

Not very difficult with proper tools, could be done in less than a day.

Here are the steps I noted:

1. Discharge AC system, adhere to local pollution regulations
2. Remove fan
4x 10 mm bolts
3. Remove fan shroud
8 mm bolts at top, pull up.
4. Drain coolant
19 mm bolt at bottom radiator, approximately 8 l.
5. Remove cooling hoses top and bottom
6. Disconnect Automatic Transmission cooling hoses, plug with self- vulcanizing tape to minimize fluid loss/spillage or collect in a bucket
7. Remove radiator top clips
8. Remove radiator
Pull up
9. Loosen power steering V-belt, and remove belts
Loosen 13 mm screw, release tension (Allan nut)
10. Detach power steering pump
4x 13 mm nuts, move out of the way
11. Remove power steering bracket
4x 13 mm bolts
12. Loosen AC idler pulley and remove belt
19 mm nut, use 21 mm spanner as counterhold
13. Undo AC hoses to compressor
14. Undo AC hose bracket attached to front of engine
6 mm Allan key
15. Undo hose connector at rear end of compressor
17 mm nut
16. Remove AC hoses
17. Disconnect electric clutch connector
18. Remove nut and bolt attachments at rear of compressor
17 mm, on assemble verify that o-ring is in place and do not overtighten
19. Undo compressor bracket middle attachments
2x 6 mm Allan bolts next to timing wheel at front of engine, use socket with long Allan keys, very tight
20. Remove compressor bracket front attachment
6 mm Allan nut?
21. Lift compressor out
22. Assemble in reverse order, top up coolant and ATF, remember to add oil to new compressor (approx. 200cc)
 
#9 ·
Not very difficult with proper tools, could be done in less than a day.

19. Undo compressor bracket middle attachments
2x 6 mm Allan bolts next to timing wheel at front of engine, use socket with long Allan keys, very tight
Well, I guess it could be done in less than a day if everything goes as well as it does in theory. But I stripped the topmost of the 2 6mm Allen bolts that fasten the front of the bracket to the engine housing, and now I’m going into my third day.

As the attached picture shows, I tried sawing a slit in the head, and using a socket with a flat head screwdriver tip to get it out. But that didn't work, and I don't have a welder. So I guess I’m going to have to drill it out, and tap a new hole.

However, as I’ve never done that, I was wondering if someone here could tell me how difficult it is, and what size drill bit, tap, and replacement bolt I should use, if I do decide to do it.

As you can see from the picture, I’ll have to go through a hole in the bracket to get to the bolt. So I’ll have to use a long drill bit and a tap extension to get to it. But I don’t see that as being a problem, as both seem to be readily accessible.

OTOH, I’m a little afraid of the tap stripping the aluminum, and having to use a helicoil or other insert to get a new bolt to hold.
So, I would greatly appreciate any advice from anybody who’s done this before.

Thanks in advance.
Bill
 

Attachments

#5 ·
Thanks for the step procedure.
I think I have most of the tools.
I'll have to get some long allen keys and some self vulcanizing tape.

Carl
 
#6 ·
Hi,

Since I'm getting ready to do replace the compressor on my '81 380sl, I was wondering if you did this and, if so, whether you or anyone else could give me any additional tips before I start.

In particular, I was wondering: 1) How much PAG oil to put in the new AC Delco compressor, given that my car is using R-134; 2) how much R-134 the system takes; and 3) what the self-vulcanizing tape is for.

Also, I noticed that the CD says to "unscrew pressure and suction hose from pipeline (16)," "remove pipeline from refrigerant compressor" and, then, "install the pipeline on the new compressor -- apparently before you put the new compressor and its carrier back on the car?

Is this the best or only way to do it, or can the pipeline just be detached from the old compressor and attached to the new compressor after it's been put into the car?

Thanks very much in advance for any additional clarification anyone here can give me.

Bill
 
#7 ·
The original system takes 1 kg R12, whoever supplies the R134 should be able to provide info on how much R134 this is.

It should be possible to connect the AC manifold hoses after the compressor is installed.

The selfvulcanizing tape is used to temporary seal the automatic transmission oil cooling hoses and radiator connections. If you are quick, there is mimiumum spillage and you only need to top off a small amount of automatic transmission fluid.
 
#10 ·
I had a similar mishap when removing my alternator bracket. What worked for me was to find an 8 point socket that is just too small to slip over the socket head. Put an extension on the socket and have a hammer ready. Use a torch to heat the bolt as hot as is safe and then hammer the socket onto the bolt. While its still hot torque it out with a ratchet.

Not sure if it will work for you since the head has been compromised by the slit. Good luck either way, that's a total buzz kill!

Matt.
 
#11 ·
I’m ‘static, Matt! “ ‘Static!”

I got up early this morning and hammered a ½" socket on to the bolt head. But that didn’t work. So I went over to Harbor Freight at 8 A.M., and got their bolt extractor set for $15.99 with a 20% off coupon.

As you can see in the photo, each socket has teeth going counter clockwise. So when you hammer them on to a bolt head, they bite in, and grip it when you turn the bolt counter clockwise.

The ½" socket fit snugly on the 6mm Allen Bolt head even though I had cut a slot into it and deformed it. However, in retrospect, that may have actually helped the socket grip the head.

In any case, I pounded the socket down on to the bolt head, heated the block around the bolt, and turned the socket with a long extension.

Voila! It loosened the bolt in a few seconds, and not very much torque. It’s the greatest feeling in the world. Maybe better than sex, even, because it eliminated the need to drill that sucker out, or have it towed back and forth to an Indy.

In fact, as you can see in the photos, the bolt is a two inch long, steel lag bolt. So, to get it out, I would have had to drill all the way down to the end, then tap in new threads.

Now I can go away for the weekend, and get drunk without having to worry about it. :)

Take care, and thanks again for the ideas !

Bill
 

Attachments

#15 ·
#16 ·
#19 ·
It is much easier from the underside, I used standard ramps to get space.

Seems you are well on your way, mounting the parts will be a lot faster.

I used the opportunity to repaint the compressor bracket whilst it was out.
I also replaced the AC manifold hoses, they were crimped on, cut the crimp (outer metal) close to where the hoses end with a Dremel tool and used double clamps for the new hoses.
 
#20 ·
Now that is interesting.
So you were able to crimp together a leak free hose?
I assume that was the low pressure side?
Where did you purchase the rubber hose material.

Carl
 
#21 ·
Bought the hoses from a UK company specializing in AC a long time ago can't recall the name. They also sold the connectors. Think it still available from the local MB dealer, sold by the meter.

In my most recent overhaul I bought a new manifold from Ecklers, one of the hoses with crimp ons was too long and had the wrong connector, cut the hose and put on the old connector. I currently traveling, so need the take a look the car to determine if it was HP or LP. Think it was the smallest of the two connectors.
 
#22 · (Edited)
I know this is a little old thread, but I would like to share my compressor removal!

First of all, I have an 85 380SL, so not sure how or where but I believe all engines of that 107 designs are situated the same. Soooooooooooooo

I didn't remove the fan or the radiator or anything else that takes half a day and huge mess! All you need to do is unbolt the power steering pump, which is 3 bolts, than one hose that is closes to the front of the car. Plug the end cause the power steering fluid will leak out! I used a tight hose with a cap.
Next, I moved the power steering pump upwards and to the side.....you have to tilt it a bit so the fluid doesn't leak out. I lost maybe 5-6 Table spoons, which I added after the job was done. Anyways....There is a bracket thats bolted to the head now with 4 bolts (10mm socket did the job perfectly) After that, we unbolted the 2 front Allens bolts as specified above in prior posts. Now make sure, the crankshaft is aligned :) I'm sure most of ya will say, huh???? Yeah, believe it or not, the crank has a notch in it to align it to the bottom allen bolt so you can put a nice H6 socket straight in!
After that, there are 2 bolts behind the compressor....easy to get to with a swivel...Also, those have to be undone from underneath the car. Make sure as always you have the car on jack stands....

I personally (after the system was properly evacuated) took the pipes off from the compressor by unbolting one single bolt, holding both of them in....After that, the AC lines came out, and the compressor slipped right out....Well, it took 2 people to take it out cause this thing is at least 50 lbs!!!

I pulled out a nice hardly used Denso compressor out of a 91 420SEL, and even the aluminum compressor bracket fit as it supposed to....Needed couple spacers in the rear holes, but the fronts along with the belt tensioner worked as oem/stock. The r134a compressor fit right in.....total charge was around $100 from the junkyard....it was still almost new and the hoses had part# tags still attached to them.....

Well, this is not a how to convert, it's about taking the compressor out thread....sooooo, just saying, you don't need a whole day....My buddy and I did it in about 3-3.5 hrs....but the car does need to be up.....

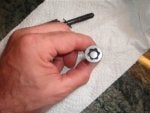
As a strong suggestion...USE 6MM SOCKET MOUNTED ALLEN KEY.....it will save you headache....I promise you. Yes, they are a little pricey, but I picked one up at Lowe's as single unit for like $7 or so?
 
#30 ·
I'm starting to get psyched and gather materials to replace my air conditioning compressor. I'm considering following the procedure posted by lasvegascop, below. Is the 85 SL compressor situated the same as in my 1980 SL? I'm thinking of the aluminum replacement compressor so it is it worth the money? I have the right tools and plan to pull it from the bottom. Any advice is welcome, thank you for your thoughts.
-Ken
 
#24 ·
Topic: 380SL - How do you remove AC compressor

Just joined and this post was very helpful as I have just purchased my '84 380SL and the compressor needs to be changed.
I need to replace the radiator so I'll follow your instructions to a Tee.
I've never owned a MB before and am really impressed with the workmanship.:smile:smile
 
#26 ·
Unfortunately R134 has less cooling capacity than the original R12. If you put a thermometer at the vent the R12 should create air at 40 degrees F. The R134 is much higher but I forget the temp. I am a big fan of using the fluid the system was originally designed for, namely R12. I just purchased 30 more pounds of Freon 12 on Ebay so it will be a long time before I run out (two current vehicles using it). Do I destroy the ozone layer with R12? Absolutely not... the 2.5 pounds I charged my Lincoln with five years ago remains in the system not in the atmosphere. Fixing all leaks in advance creates a closed system that works the way it was designed to do.

Did you install a new receiver/dryer? That along with the compressor oil must be changed to be compatible with 134. The system must be fully evacuated of old oil and moisture for the conversion to work. Ideally you need to pull 14 inches of vacuum that holds steady for at least 24 hours. To get the same cooling capacity you would need a new expansion value designed for R134, and I'm not sure how to do that. Good luck.
 
#27 ·
Thank you for replying PanzerPuff. I have a new receiver/dryer and had just installed a freshly overhauled compressor. The rest is original. I converted the system to R134 about 20 years ago and now wish I hadn't. With that said, I was able to get ice-cold air with R134 in the system during all of this time. I just do not remember how much of R134 I originally used. My low pressure port has been converted and will not even budge and my new compressor has already been filled with 8oz of PAG46, so I might as well continue using R134. And, yes, I did vacuum the system for 2 hours and it holds up well.
 
#31 ·
I'm getting ready to try that procedure too.
If I run into problems, then I'll remove the Radiator.

Just received an aluminum body A6 compatible Compressor (part # AC Delco 15-22255).
Supposed to be guaranteed an exact fit.

Planning on replacing the Receiver Dryer and using Enviro-Safe freon.
My compressor has a leak.