Mercedes-Benz Forum banner

"Hot Wire" The Glow Plugs?

1 reading
8.6K views 17 replies 10 participants last post by  EnjoY240D  
#1 ·
Okay, here's the scoop. My ignition switch broke and needs to be replaced, this is something I can do...in my driveway...my car is stuck at work and I need to get it home.

The switch is stuck in the "on" or number 2 position so I can "hot wire" the starter. As a matter of fact when I do this she wants to start. The problem is, I need to engage the glow plugs first!

Is there a a way to "hot wire" my glow plugs for about 10 to 15 seconds...before I go and "hot wire" the starter? Like I said, the ignition switch broke in the "on" position and I can't cycle it back to the "1" position to charge the glow plugs.

By the way I took the tumbler out, it's fine...and there is no problem with the steering lock...just a bad switch.

Any help (in laymans terms please) would help.

Thanks
Dave
 
#4 ·
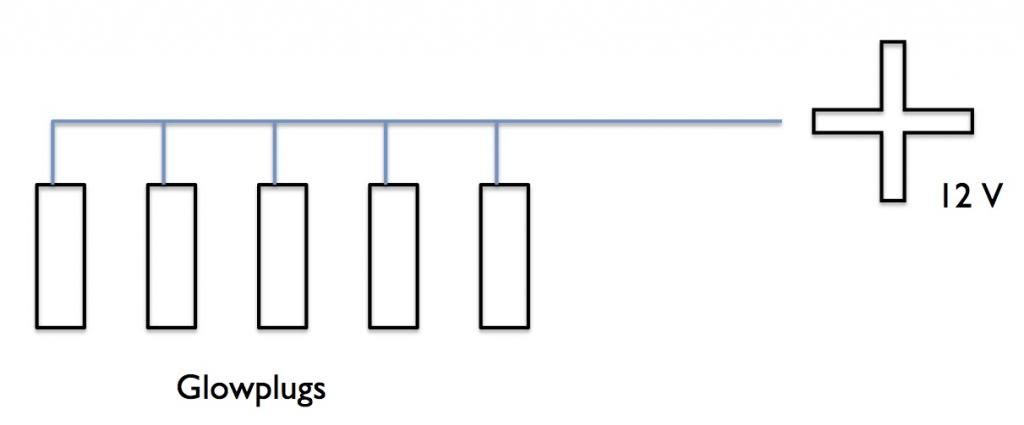
The glow plugs are in parallel on the newer cars. They are grounded through the cylinder head / threaded section of the plug body. If you feed 12 volts to them from the battery, they will glow, but you will only be able to do one at a time since each plug has its own wire coming from the pre-glow timer relay.

If you remove the wires going to the glow plugs, which I would recommend to prevent any backfeeding of current to the electrical system, then you can take a cable to the threaded end of the glow plug where the wire attaches to and the other end to the positive battery terminal. This will allow the plug to glow. You should glow each one for about 15 seconds or so and the car should start.

I would recommend using a large gauge cable or even jumper cables, and wearing a glove as the glow plugs draw a decent amount of power and will make the cable you are using to make them glow become quite hot.

Best of luck to you.

Kyle
 
#5 ·
Hotwiring glow plugs: I had a failure of the preglow system in my '78 300D, which at the time had the original series-wired loop-type glowplugs. I had to jump the glow plugs to get the engine started. I connected a #10 wire from the positive battery terminal to the #5 glow plug terminal. Nothing happened. I then went to the #4 glowplug, and the jumper wire from it to #3 glowed red hot. I jumped back into the car and cranked the engine, and it fired up, more roughly than usual. The second time I did this, the #4-#3 wire did not glow, so I went to #3 terminal with the jumper, and a large arc, followed by no power draw demonstrated the demise of another glow plug (it turned out to be #3. This was not the way to go, because the glow plugs are rated for about 0.9 volts each, and the resistance of all the jumper wires and other glowplugs reduce the 12 volts over the whole series to less than 0.9 volts per glowplug. I have changed the system to the newer parallel-wired style using adapter "pencil" plugs. What a change! This thing never started so fast and easy! The parallel plugs are wired together with #10 bus cables, so that all plugs get a full 12 volts off the same OEM relay power lead. I replaced the 50 amp fuse in this lead with a 50 amp self-resetting circuit breaker, and all is well.
 
#11 ·
This is a picture of the Wiring Terminal/Junction Block in front of the Battery on the Fender Well. This is where you can jump start the Starter on Models with a Turbo Charger.
The 2 Yellow Arrows show you where you should jump it. Be sure your transmission is in Park or neutral.

Concerning the Glow Plugs. The Viiolet/Purple Wire under the White Wire on the Terminal Block goes to the Glow Plug Relay and the White Wire goes down to the small terminal on the Starter Solenoid.

When things are functioning normal the electricity comes up through that white Wire from the Starter Solenoid and goes into the Violet Wire and that activates your Glow Plug Relay while the Starter is cranking.

When you are jumping the terminals the Electricity goes from the left of the Terminal Block down the White Wire to the Starter Solenoid and at the same time turns on the Glow Plug Relay.

If you want to preglow from that junction block you need to remove the Voilet Wire and touch only the Violet Wire to the left Terminals on the Junction Block. When you think you have glowed enough quickly shove it back under the Screw on the right side; tighten the screw and use something to Jump the terminal block to start.

I am not sure what is going on from your description of your Ignition trouble.

If your Ignition Lock Tumbler is in the position to do so pull out the Ignition Lock Tumbler and the outer sleeve.
In that same position you should be able to disconnect the Ignition switch Plug.
At that Point I would remove the Steering Colum Lock.
Once the Steering Colum Lock is off you can easily remove the Ignition Switch.
I was able to remove My Steering Colum Lock without lowering the Steering Colum.
Others have lowered the Steering Colum but don't force anything.

Once the Steering Colum Lock is out you are in a position to more easily do some troubleshooting.

For Steering Colum Lock and Ignition Lock Tumbler issues see the below
Repair Links
DIY Links by Parts Category - PeachParts Mercedes ShopForum
PeachPartsWiki: Do It Yourself Articles - Mercedes Vehicles

I bought a new Steering Colum Lock from a online genuine Mercedes Parts Dealer. It is made by Neiman (France). It comes as an assembly with a new Ignition Switch, Vacuum Switch and the Steering Colum Lock.
Apparently Neiman/Valeo are the same company. The one I got from the Dealer was $144 last year.
The Neiman/Valeo ones are about $20 less.
Beware as Myele and another company sell the Steering Colum Lock with out the Ignition Switch or Vacuum Switch. Read their Ads closely.

Also when I had My trouble it turned out the innards of the Steering Colum Lock were broke and in addition one of the Contacts was burned up on the Ignition Switch.
After cleaning My Lock Tumbler so far has been OK.
 
#12 ·
Padre,

How many miles on your MB? Boy this looks to be a PITA....................

300Dman,

Nice write up. I think I read that you were a Diesel Mechanic somewhere on here, way to go Bro!

D
 
#13 ·
Thanks for the awesome and well thought out responses guys! 300d man, your response was right on, I'll give it a go this afternoon. If it doesn't work I'll give it a shot of wd-40.

A believe the ignition switch broke. The steering column lock and tumbler function just fine...with the tumbler out, I can take a pair of needle nose plyers and turn the switch 360 degrees with the car never getting out of the #2 positon. This is why I can hot wire the starter...it already has battery power. As a matter of fact when I turned the key...it felt like something snapped which is why I suspect the starter switch.

300dave...the car has 305,000 miles and runs like new...when running lol.
 
#14 ·
It may be the Ignition Switch Broke but this is what I found inside of My Steering Colum Lock.
#1 is broken off and when in good condition goes into the Ignition Switch and is actually a hollow tube; not strong to begin with.
#2 is cracked
In the last year others have been having internal breakages of their Steering Colum Locks. I believe that they are reaching the end of their service life.
 

Attachments

#15 ·
300dman, your advice on getting it started worked and I was able to get her home. If it were legal to send beer in the mail...I'd owe you a six pack at least. Thanks for the pics too...I think that my "tube" is broken I'll let you know which when I get that far. As of now though I believe I'll just go ahead and order an entire new lock assembly to be safe.

Do you recommend new, or the guys at the junk yard say they can get a refurbished one for 100 bucks? Do I trust the junk yard one to save some $$ ?
 
#17 ·
If there is a such think as a rebuilt Steering Colum Lock I have not read of One.

If you go to the Junk Yard and there is no key to remove the Ignition Lock Tumbler with you will not be able to remove the Steering Colum Lock unless you grind off or drill our a Pin that stick into a Hole where it mounts.
You have to do that very same think if you cannot get the Lock Tumbler out of your own.

How to do the normal Steering Colum Lock Removal and how to do it with the Lock Tumbler in place is in the below links.

Repair Links
DIY Links by Parts Category - PeachParts Mercedes ShopForum
PeachPartsWiki: Do It Yourself Articles - Mercedes Vehicles

In My own case I was able to remove the Lock Tumbler and the Sleeve.

After that I removed the Panel that is above you Knees when you sit.

Looking up under the Instrument Panel on the right side you will see where the Steering Colum Lock inserts into a Tube and you will see a Clamp that you need to loosen.

After the Clamp is loosened you need to stick something inside of the space where the Lock Tumbler is removed and rotate it. As you do that the Rod that locks the Steering Colum pull inside of the Steering Colum Lock.
You cannot see that but there is a Brass colored Pin sticking through a hole in the Steel Tube.
When the Bolt is retracted enough you can press in that Brass Button/Pin and you will be able to rotate and pull the Steering Colum Lock past that Hole.

In My case once I did that I was able after some time manipulating the Steering Colum Lock in different positions to gat the Colum Lock without lowering the Steering Colum (I was also able to get it back in without lowering the Steering Colum).

However, if you cannot get the Lock Tumbler and Sleeve off you will likely need to lower the Steering Colum to make it easier to drill out or grind off that Button/Pin.
 
#18 ·
Isn't the "run" position where power is to the glow plug relay? Then it times out. Get everything in place to "hot wire" the starter, pull the plug going from the ignition switch to the relay, plug it in again, and do your hot wire. I would thing this would give you a glow plug cycle just prior to the "hot wire" start.