There has been a lot written about this job, mainly how difficult and time-consuming it can be. I was asked by a local shop to take it on for a very nice low-mileage 1995 SL500. They didn't want to do it because it would tie up their best tech for a long time and they were concerned about something going wrong and having to eat a bunch of time. Being retired, I didn't have that concern, so I agreed to take it on for a fixed price.
I would say that I enjoyed about 95% of the job. Nothing was very dirty or heavy, and the only reason to go under the car is to drain some coolant. Most of us hands-on types wouldn't be concerned about any of the steps in the job, but this is a case where the whole got greater than the sum of the parts. So if you are driving around this summer with the windows down because you have no AC, consider doing the job - it's not as difficult as it's reputation. Just take it one step at a time.
Here are the steps for disassembly as I recall them:
-3. Remove or have removed, any R134 in system.
-2. Get Alldatadiy subscription for vehicle.
-1. Put soft top down.
=========================================
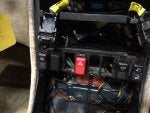
1. Disconnect battery. Remove ACC controls radio, ashtray, shifter surround, shift knob and finally console wood and switches.
2. Remove center console.
3. Remove center vent and spectacle case
4. Remove dash speakers and side vents
5. Disconnect/remove parking brake handle/surround and light switch
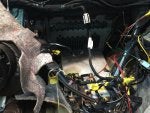
6. Remove air bag and steering wheel.
7. Remove instrument cluster
8. Unscrew combination/cruise control levers and let hang down.
9. Remove under-dash covers on both sides, carpeted bolster on driver's side.
10. Remove dashboard by lifting it up from defrost vents and pulling it back.
11. Remove defrost and side vents from heat/ac assembly, remove four nuts holding assembly to firewall and bottom center bracket (two screws).
12. Disconnect and label all vacuum and electrical connections. Remove foam drain hoses.
=========================================
13. Drain radiator.
14. Remove grilles around windshield
15. Remove air filter and housing
15. Remove wiper and wiper motor
16. Remove large firewall "pan".
17. Disconnect heater hoses both sides.
18. Slacken clamp holding big AC hose, undo plate holding lines to expansion valve, pull lines away from valve, and remove valve.
=========================================
19. Remove evaporator/heater assembly. First, pull it back to clear the studs in the firewall. Then lift and pull on the right side. As the heater pipes clear the firewall, pull out the left side and lift assembly out. There will be coolant in the heater core, so be careful not to allow the pipe to point down. Ideal to cap pipes before lifting out of the car.
20. Remove top of the heater/AC box, remove the heater core, and then the evaporator.
The road back.
21. Install the new evaporator assembly, the heater core (with new o-rings), and put the top of the box back on.
22. Re-install the assembly in the dash. First line up the left side and position the right-side heater lines to go through the holes in the firewall. Alternately move the left and right sides forward until the assembly is on the studs on the firewall. This is probably the most challenging part. There is a foam seal on left side that is clipped to the evaporator pipes. It is very easy to dislodge this seal as you are maneuvering the assembly into position. If this happens, you won't have a good seal against the firewall and it will make the connection of the pipes on the engine side to the expansion valve difficult.
The rest of it is pretty much the reverse of the first 18 steps.
I will continue this thread with some pictures and helpful hints for each step as time permits.
Cheers,
CT
I would say that I enjoyed about 95% of the job. Nothing was very dirty or heavy, and the only reason to go under the car is to drain some coolant. Most of us hands-on types wouldn't be concerned about any of the steps in the job, but this is a case where the whole got greater than the sum of the parts. So if you are driving around this summer with the windows down because you have no AC, consider doing the job - it's not as difficult as it's reputation. Just take it one step at a time.
Here are the steps for disassembly as I recall them:
-3. Remove or have removed, any R134 in system.
-2. Get Alldatadiy subscription for vehicle.
-1. Put soft top down.
=========================================
1. Disconnect battery. Remove ACC controls radio, ashtray, shifter surround, shift knob and finally console wood and switches.
2. Remove center console.
3. Remove center vent and spectacle case
4. Remove dash speakers and side vents
5. Disconnect/remove parking brake handle/surround and light switch
6. Remove air bag and steering wheel.
7. Remove instrument cluster
8. Unscrew combination/cruise control levers and let hang down.
9. Remove under-dash covers on both sides, carpeted bolster on driver's side.
10. Remove dashboard by lifting it up from defrost vents and pulling it back.
11. Remove defrost and side vents from heat/ac assembly, remove four nuts holding assembly to firewall and bottom center bracket (two screws).
12. Disconnect and label all vacuum and electrical connections. Remove foam drain hoses.
=========================================
13. Drain radiator.
14. Remove grilles around windshield
15. Remove air filter and housing
15. Remove wiper and wiper motor
16. Remove large firewall "pan".
17. Disconnect heater hoses both sides.
18. Slacken clamp holding big AC hose, undo plate holding lines to expansion valve, pull lines away from valve, and remove valve.
=========================================
19. Remove evaporator/heater assembly. First, pull it back to clear the studs in the firewall. Then lift and pull on the right side. As the heater pipes clear the firewall, pull out the left side and lift assembly out. There will be coolant in the heater core, so be careful not to allow the pipe to point down. Ideal to cap pipes before lifting out of the car.
20. Remove top of the heater/AC box, remove the heater core, and then the evaporator.
The road back.
21. Install the new evaporator assembly, the heater core (with new o-rings), and put the top of the box back on.
22. Re-install the assembly in the dash. First line up the left side and position the right-side heater lines to go through the holes in the firewall. Alternately move the left and right sides forward until the assembly is on the studs on the firewall. This is probably the most challenging part. There is a foam seal on left side that is clipped to the evaporator pipes. It is very easy to dislodge this seal as you are maneuvering the assembly into position. If this happens, you won't have a good seal against the firewall and it will make the connection of the pipes on the engine side to the expansion valve difficult.
The rest of it is pretty much the reverse of the first 18 steps.
I will continue this thread with some pictures and helpful hints for each step as time permits.
Cheers,
CT