Mercedes-Benz Forum banner

Removing D-Jet Injectors

5.6K views 28 replies 4 participants last post by  andya  
#1 ·
I am working my way through this job to replace all of the fuel hoses. I've found that injector #7 is missing it's pintle cap. Is this something to worry about? Do I need to get a borescope to see if it's inside and remove it?

Thanks, Andy
 
#3 ·
They do seem to disappear! And they should all be replaced while you have the injectors out (along with the seals). Be careful removing them. Sometimes need to use a razor blade to nick them and break them away. Then be careful not to break them when installing. They are fragile. Get a few spares! I drilled holes in a piece of hardwood (or plastic?) and inserted them into those. Then pushed injector into the caps. Barri (gurunutkins) who used to come here occasionally, told me how he did them and posted that on Peachparts Vintage quite a while ago!
 
#4 · (Edited)
Thanks for the reassurance! All rails, injectors and hoses now removed.

Once I remove the hose, hold down ring, retaining C clip, pintle cap and seals from injectors I can just put the rest in an ultrasonic cleaner with concentrated Techron?

What is the best way to clean the rails?

Thanks, Andy

2610733
 
#5 · (Edited)
Yes, you can immerse the injectors in a cleaning fluid. I think I used Seafoam.
Because cleaners may contain flammables, I put the injectors & Seafoam in sealed ziplock bags and then immersed in water. I also tried using just Simple Green without the ziploks. I don't think any of this did much good! Maybe cleaned outside of injectors a bit. Maybe commercial ultrasonics would do a better job.

In the end, I set up a crude rig to flow the cleaner through the injectors while they were being cycled.It also allowed me to measure the flow from each injector. At first I did one at a time. Later version, I did 4 at a time and more easily compared flows. In the Djet section of EGV107, there is the Comprehensive Guide. It mentions my set up (used my pressure brake bleeder) My original post should be somewhere too, but with new forum software, it may be hard to find and links to pictures may or may not be there.


One other thing. There are small filter screens on the injector inlets. These can be removed so screens can be cleaned. Ultrasonic may work for them once removed. To get them out, I used a small coarse screw that just gripped the filter, then pulled them out. Some people flow backwards through injector while cycling - Then you really need the screens out of there.

When cycling injectors it is recommended to use about 3V. I used 12v initially, but I think I later connected 4 in series when I did did 4x cleaning.

Sorry - probably information overload!
 
#6 ·
Many thanks Graham! Its not information oveload - you should see my list of notes for my 450SL compiled over the last seven months. :)

Turns out my injectors use the green lower ring seals not the top hats so now waiting for those to arrive while I do the cleaning.

Andy
 
#9 · (Edited)
How do I get the hose off the injector? I've tried a Dremel on the ring part - it just spins around. The hose is crumbly but hanging in there. The blue plastic on the injector is brittle and chunks are coming off in my attempts to get the hose off.

The FSM says to use a soldering iron and run it up and down the hose... is that the way to go?

UPDATE - soldering iron works, but it's a nasty job. Two down, six to go.


2610934
 
#10 ·
It's been a while, but I think I used a file on the sleeves first and then side cutters.
For the hose itself, I read the concerns about damaging the hose barb. Then used a knife with very small part of blade protruding. Just enough to get through outer part of hose. Then cut one side of other end of hose all way to the barb. Then pulled with pliers or small vicegrip. Using soldering iron with flat cutter type tip would no doubt be safer way to avoid damage to barbs.

Plastic on one or two of my original injectors had also cracked. But luckily I acquired some spares.
 
#11 ·
Thanks! I found the a method that worked with what I could scrape together and I was able to remove the hoses off the last six injectors in less than two minutes per injector.

  1. Using a Dremel on medium speed with a small stone grinding wheel grind the side of the crimp thing on the opposite side to the electrical connector until the bottom of the hose is exposed
  2. Using hose pullers pull off as much of the hose as possible. Mine were totally rotten so they crumbled to the point of the metal injector connection
  3. Set a soldering iron to it's hottest temperature then push it into the hose from the end of the injector going towards the ground away part of the crimp. Push it deep and slowly. Stinks and smokes but cuts a groove down to the injector. Keep going until reaching the end of the hose where the crimp was ground away
  4. Using the hose pullers pull off the remaining hose and the crimp falls off
Andy

2610968
 
#12 ·
OK, I made a mistake, I threw away my crumbled and destroyed feed hoses without measuring one of them. FSM doesn't show a length - anyone know what it is?

Also there are no torque specs for bolting the injectors back on - what to do here to make sure they are tight but not overtight?

Thanks! Andy
 
#13 · (Edited)
You have probably got it done by now. It's frigging cold here - -11C this morning. Hard to measure those tubes! I found two unused ones lying among my injector parts. They were unused. Hopefully correct length. They measure ~ 41mm or just under 1 5/8". But I would get a second opinion - Maybe those were the wrong length :(

I can't give you torque for hold downs. Just don't over tighten. I had a problem once - I dropped one of those bolts - Could not find it anywhere. Then found it had gone right down one of the injector holes :( Not a good place for a bolt. Had visions of having to remove manifold. But after some efforts with mirrors and magnets was able to find it and retrieve it. After that, I covered all the holes except the one I am working on!
 
#16 ·
Here are the injectors cleaned and with new seals, pintle caps (from SL Shop in the UK) and hoses. I installed the pintle caps by heating them with a heat gun and gently pushing and twisting using hose pliers.

I realy hope I haven't made a stupid mistake somewhere with this.

Andy

2612156
 
#18 ·
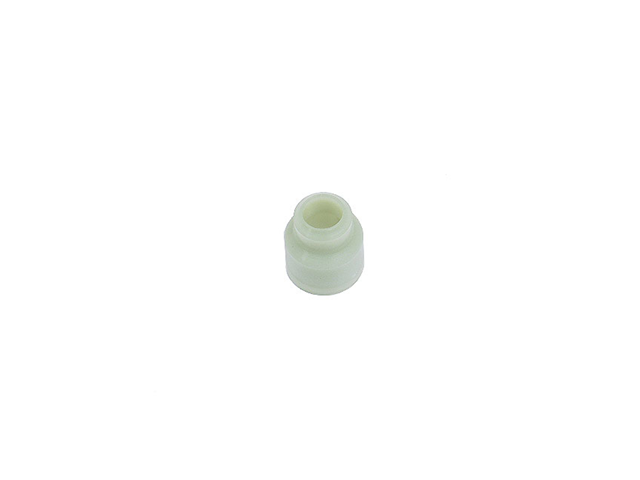
Looks like a good job! Different of course from those of us who have the top hat seals. I am not familiar with those California green seals, but in manual it shows another plastic sleeve (nozzle holder) that fits over the bottom of the injector and presumably fits in to the manifold where our rubber top hats fit. This part:https://www.autohausaz.com/pn/1160780083
Image
 
#20 · (Edited)
Looks like a good job! Different of course from those of us who have the top hat seals. I am not familiar with those California green seals, but in manual it shows another plastic sleeve (nozzle holder) that fits over the bottom of the injector and presumably fits in to the manifold where our rubber top hats fit. This part:https://www.autohausaz.com/pn/1160780083
I've put on new versions of what my injectors had when they came off the car. All but one feed hose looked original - totally rotten. I have a Federal car (491 on crossmember plate) not California, so that is weird.

Looks like I need those seals - called the dealer - NLA. I bought 116 078 04 73 by mistake.

Or could it be that a PO put the green seals on by mistake and I should be installing the top hats?

Andy
 
#22 · (Edited)
Probably. They likely stay in there when you remove the injectors. (If they could be damaged during removal, maybe just clean them up! )

The other choice, especially if those sleeves break, might be to just use the top hat seals 116 078 04 73 that you bought by mistake. They would take the place of the green seals and the plastic sleeves. That is the way the earlier Federal cars would have been.

But not sure that opening in manifold is exactly the same. Maybe someone here knows?

By the way, this is what EPC says about which cars used the green o-rings:
  • NOTE: Cal. cars fit from engine # 019517
  • NOTE: Fed. cars fit from engine # 026126
 
#25 ·
Reinstalling and of course - problem. I must have made the new hose between the fuel pressure regulator and the damper a bit too short - it had a kink in it. Not a problem - cut some more with extra length to be sure. I've installed it and it doesn't have a kink but kinda goes oval shaped around the bend (half kink?). I've rotated the damper as much as I can to ease the bend.

Thoughts on if this is OK or I should adjust something - but what?

Thanks, Andy
2612304
 
#26 · (Edited)
That hose is always a problem. We have discussed it here in past. I seem to recall that we found a molded MB hose off a different car that fitted nicely. Can't recall if I bought one, but I think so. They were hard to find and perhaps I found one in UK. (OK, found it - I bought one off eBay)

A bit of a restriction there shouldn't be a problem so long as it is constant. The important thing is to have steady pressure upstream of the pressure regulator. Yours looks fine.
 
#28 ·
I am sure there were other discussions, but this by Judy (no longer here?) had the hose info. It seems that elbow may now more readily available and is inexpensive. Some sites say it has been discontinued. In past, I seem to recall us getting another equivalent part, but I may be wrong.


Part 2014762226:
https://www.pelicanparts.com/cgi-bi...earch/pel_search_2016.cgi?command=DWsearch&description=2014762226&I1.x=0&I1.y=0