

The information I am offering pertains specifically to the 2003 S55 I own, but is probably similar to other body styles. I "fixed" the shifter by removing the offending pieces, but in doing so, I have defeated the brake/shifter interlock. That means that the car can be taken out of park at any time without having to turn the key on and/or depressing the brake pedal to do so. If you plan to leave unattended children in the car, the fix may not be right for you. I use the parking brake and have no small children. I'll let the steering lock deter potential thieves
I read several threads on the subject and they all gave some description of the process, but not in enough detail. I'm going to try and fill in some of the blanks. Let's start with describing the problem. There is a Federal Safety Standard that now requires you to press on the brake to shift the car out of park. It is probably left over from the Audi "unintended acceleration" days, but it is here and Benz built it into the cars. Adding to the complication is the fact that the shifter is supposed to remain locked in Park unless the proper key is in the ignition. So, we have two systems that are intended to keep the car in park. I am not a Mercedes tech. I am only passing on what I think I know and what I learned in tackling the shifter in my own car. The job requires that you have a reasonable array of tools and a willingness to dig into the interior of your car. It also requires a ramp, lift or jack stands so that you can disconnect the shift cable at the transmission. My car does not have Keyless go, which has an additional harness and a switch in the shift knob. As you read through this, you may wonder if you can do the job. Here's a fairly easy test. Start the task by disconnecting the shift cable at the transmission. That requires long, bent nose pliers (see the tool list in my 3rd post). If you can do that, you can probably do the rest. The car was designed to be put together easily, so don't be surprised at the number of things that snap together, rather than using fasteners. As you are putting it back together, nothing but the forward storage cubby floor should require any amount of force to put back together.
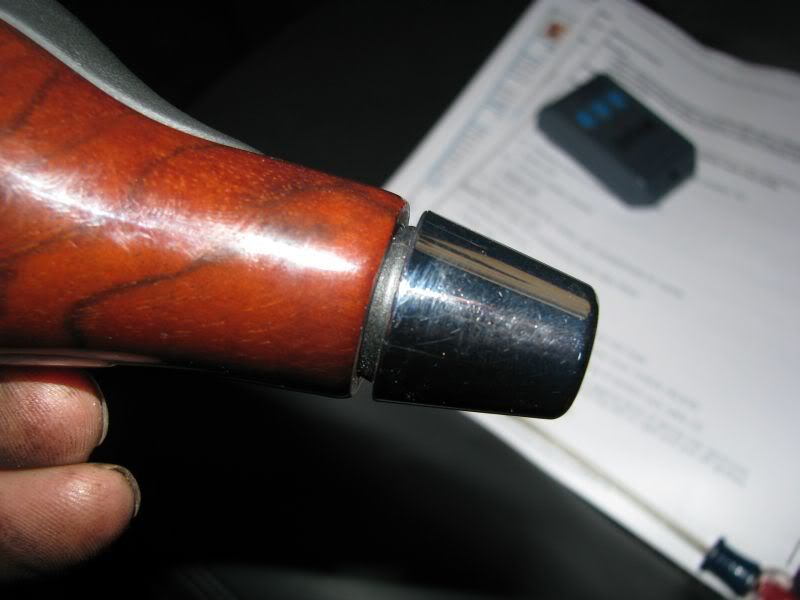
The shifter is very well attached to the car and is under the console. The console looks tough to remove, but is probably the easiest part of the job. You'll start by removing the shift knob. It has a chrome collar at the bottom which your rotate a quarter turn and the knob lifts right off!
![Image]()
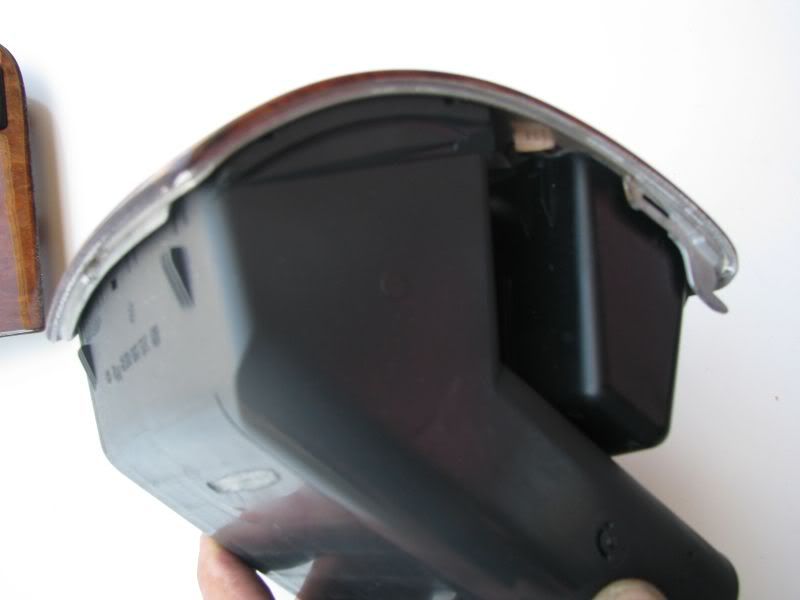
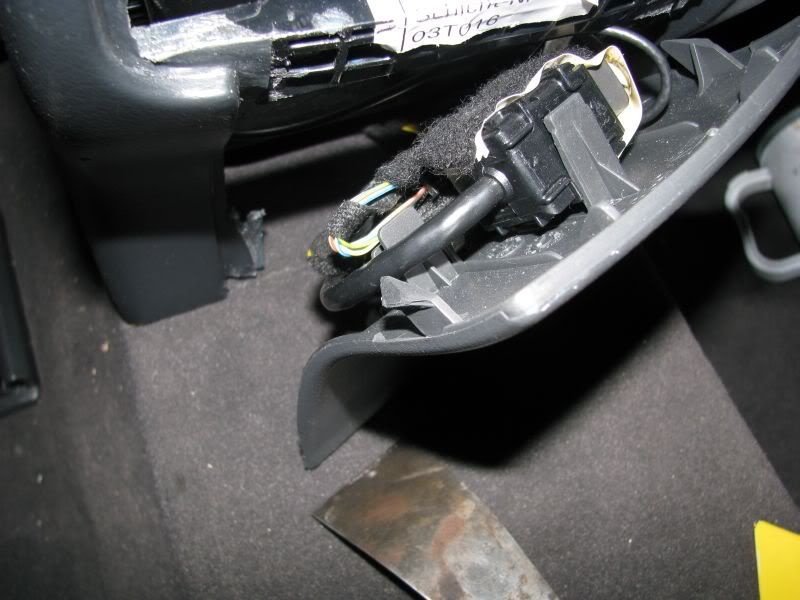
Once you have the knob removed, you need to remove the two wood faced trim pieces on the top of the console. Both of them snap in place, so the upper one (with the PRNDL lettering) simply pries off with a plastic putty knife. The lower one is removed by lifting straight up at the rear of the opening. Here are shots of both pieces, showing the attaching clips. Again, there are no screws, they simply snap on and off. They both have small wiring harnesses that attach to them. One is for illumination and the yellow ended one is for airbag defeat. The harness plugs are each retained by a tiny tabs that latch into the socket. The tab is tiny and sticks into a small square hole in the wall of the socket. You'll see the tab because the yellow of the plug shows well against the black socket. You can depress the tab or lift the socket wall to pull them apart needs to be depressed to unplug the harness.
![Image]()
![Image]()
Next, slide the lid of the little compartment at the front of the console forward. You have to remove the floor and aft wall of the little storage compartment to remove the console. The aft wall has small tabs that snap into the main console frame, so you remove it by reaching into the area of the console you opened up by removing the wood trim pieces and pushing the aft wall of the stowage compartment toward the front of the car. The tabs are toward the top. Here's a picture of the floor and back wall removed and sitting upside down, so you can see the tabs.
![Image]()
Once that is done, remove the two screw which attach the console to the shifter.
![Image]()
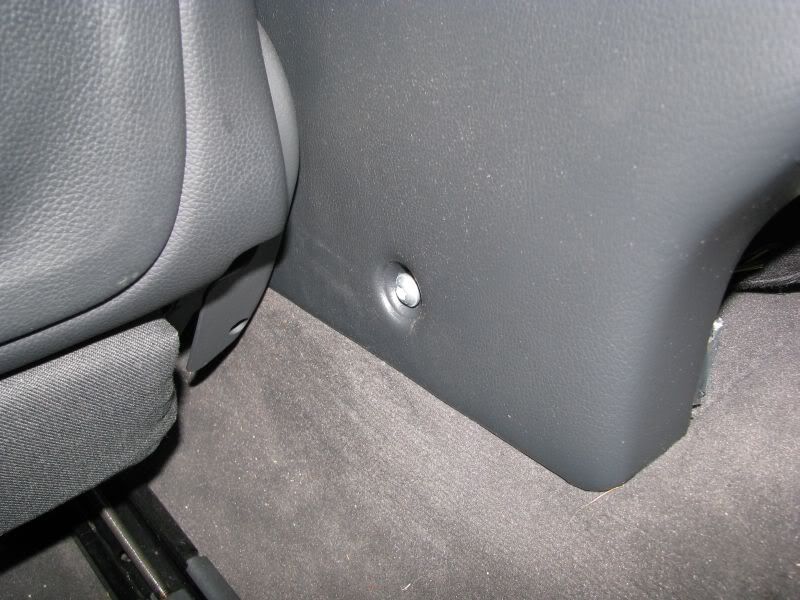
Then, move the seat forward and you'll find a plug that covers a screw low on the console toward the rear. Remove the plug and remove the screws. There's one on each side of the console and the decorative plastic cap just snaps on the head of the bolt.
![Image]()
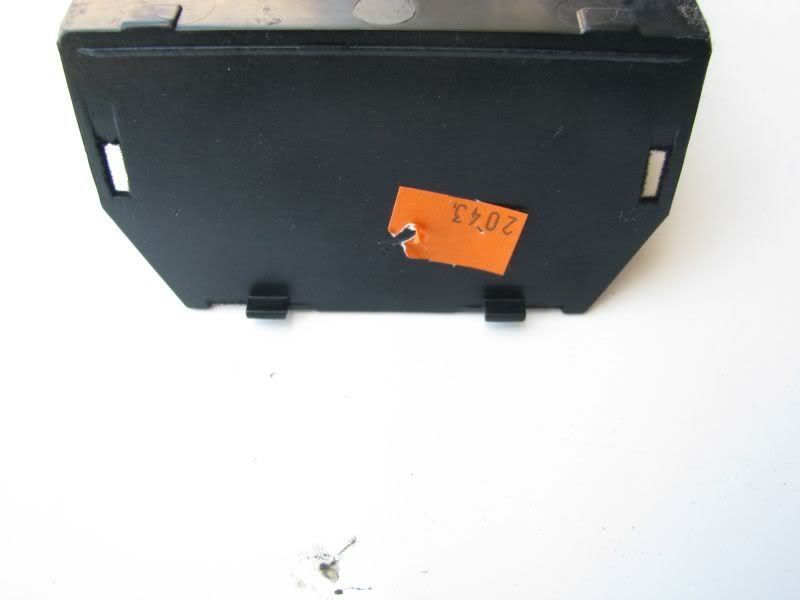
Next, you need to remove the rear A/C vent in the console. It is another snap in piece which comes out by moving the top edge toward the rear of the car. Some prying may help, but mine came right out by applying finger pressure toward the back of the car. Again, I have tried to show the small tabs that hold it in place.
![Image]()
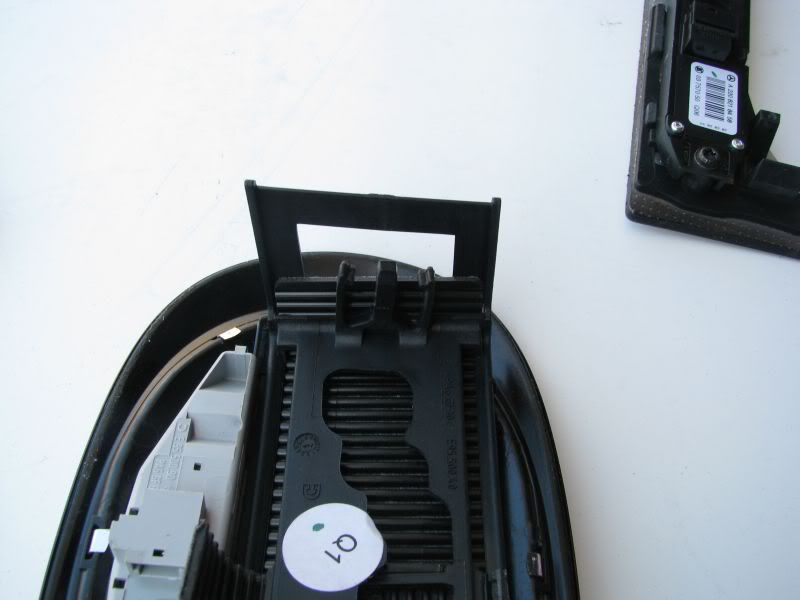
Once it is out, remove the piece that is right below it. It lifts up and out and may have a couple wiring harnesses taped to it, depending on your cell phone installation. There's also a two wire harness for a light inside the console. The cell phone wiring may go up into the console lid, but it all can be disconnected near the rear lower panel. Depending on your cell phone options, the wiring may be diffrent. It might be good to write yourself a note with how many wires there are and where they go. Once the wiring is disconnected, you should be able to lift the rear of the console and the whole thing will come right out. So much for the easy part.
![Image]()
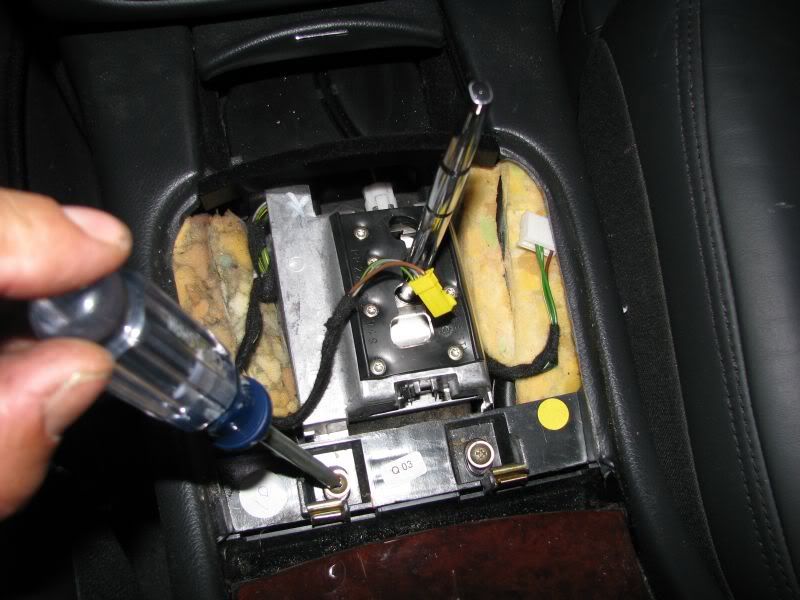
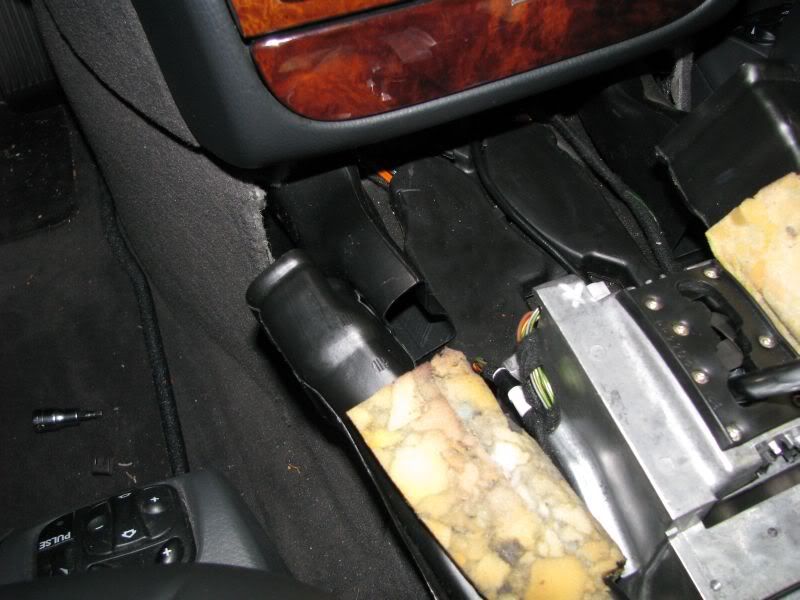
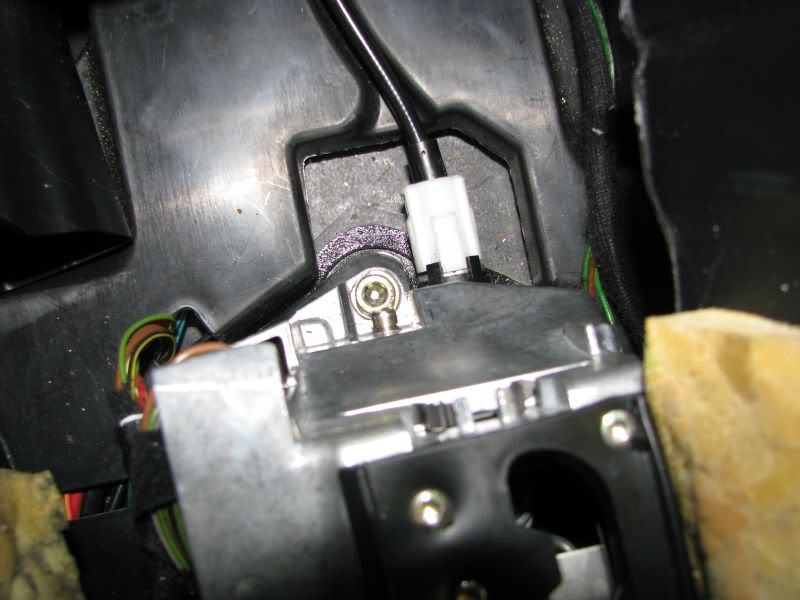
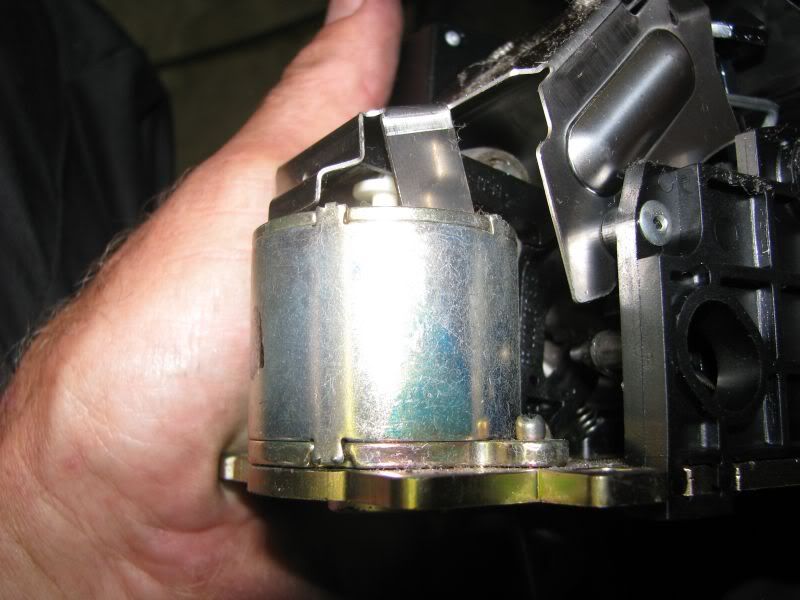
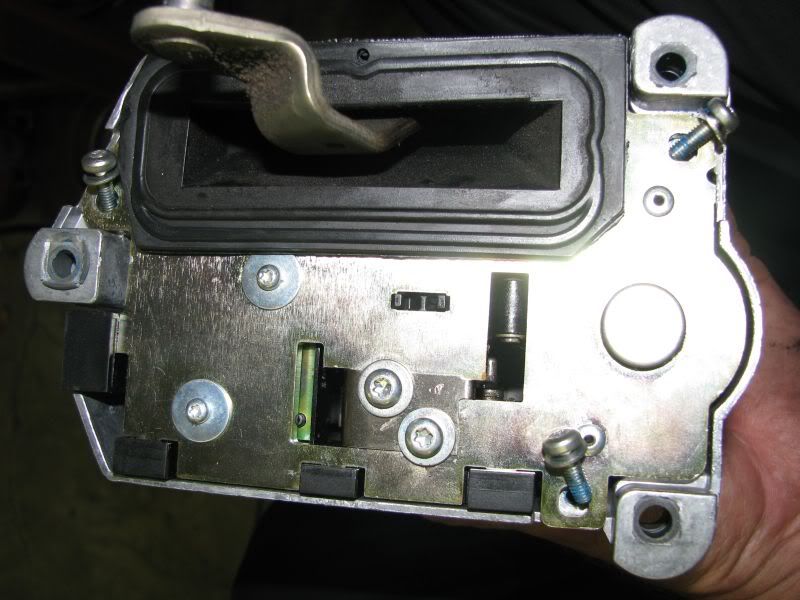
At this point, the shifter is sitting there looking like only three screws need to be removed and it is out. Not quite. Up to this point, it does not matter if the ignition has been turned on. But from what I've read, if the ignition is turned on while the wiring harness to the shifter is disconnected, it will set a trouble code. So, there is an easy fix. If you can get it out of park, set the parking brake and move it into neutral. Turn the key off as far as you can. You won't be able to remove the key, but the ignition is off. There are one or two harnesses that plug into the shifter, depending on if you have Keyless go. They have the same tiny tab that needs to be depressed, so press on the tab and disconnect them. All of the harnesses are different sizes and shapes, so you can't mix them up. The shifter is held in with three socket head caps screws. The rear two are hidden by the black "Y" shaped A/C duct that runs under a very large plate, making it impossible to remove. Why? Who knows? I simply pried the ductwork to the side and removed the screws. And then there is the front screw. You'll notice that it is nicely accessible except for a 1/4 inch diameter pin and clip sticking out of the front of the shifter. I can only guess it is there to slow down car thieves, as if any one who is that deeply into the car will be slowed down by it. If your car is stuck in park, it is going to take a ball ended Allen wrench to remove it, since if the shifter is in park, you can't get it out of the way. Some people have had luck with a torx driver bit stuck in at an angle. Getting that screw out can be a challenge! Anyway, to the right of the screw is the ignition interlock cable. It is clipped into the A/C duct and disappears into the front of the shifter. But simply rotate it a quarter turn toward the passenger seat and it comes right out. That leaves only the pin and the clip. The clip will pry off easily and the pin then slide far enough into the shifter housing that you can get the bolt out. It won't go anywhere or get lost, so remove the clip and get it out of your way. Remove the forward screw and the shifter should then be loose
![Image]()
![Image]()
Because of image limitations by the website, the process continues in the next thread
I read several threads on the subject and they all gave some description of the process, but not in enough detail. I'm going to try and fill in some of the blanks. Let's start with describing the problem. There is a Federal Safety Standard that now requires you to press on the brake to shift the car out of park. It is probably left over from the Audi "unintended acceleration" days, but it is here and Benz built it into the cars. Adding to the complication is the fact that the shifter is supposed to remain locked in Park unless the proper key is in the ignition. So, we have two systems that are intended to keep the car in park. I am not a Mercedes tech. I am only passing on what I think I know and what I learned in tackling the shifter in my own car. The job requires that you have a reasonable array of tools and a willingness to dig into the interior of your car. It also requires a ramp, lift or jack stands so that you can disconnect the shift cable at the transmission. My car does not have Keyless go, which has an additional harness and a switch in the shift knob. As you read through this, you may wonder if you can do the job. Here's a fairly easy test. Start the task by disconnecting the shift cable at the transmission. That requires long, bent nose pliers (see the tool list in my 3rd post). If you can do that, you can probably do the rest. The car was designed to be put together easily, so don't be surprised at the number of things that snap together, rather than using fasteners. As you are putting it back together, nothing but the forward storage cubby floor should require any amount of force to put back together.
The shifter is very well attached to the car and is under the console. The console looks tough to remove, but is probably the easiest part of the job. You'll start by removing the shift knob. It has a chrome collar at the bottom which your rotate a quarter turn and the knob lifts right off!
Once you have the knob removed, you need to remove the two wood faced trim pieces on the top of the console. Both of them snap in place, so the upper one (with the PRNDL lettering) simply pries off with a plastic putty knife. The lower one is removed by lifting straight up at the rear of the opening. Here are shots of both pieces, showing the attaching clips. Again, there are no screws, they simply snap on and off. They both have small wiring harnesses that attach to them. One is for illumination and the yellow ended one is for airbag defeat. The harness plugs are each retained by a tiny tabs that latch into the socket. The tab is tiny and sticks into a small square hole in the wall of the socket. You'll see the tab because the yellow of the plug shows well against the black socket. You can depress the tab or lift the socket wall to pull them apart needs to be depressed to unplug the harness.
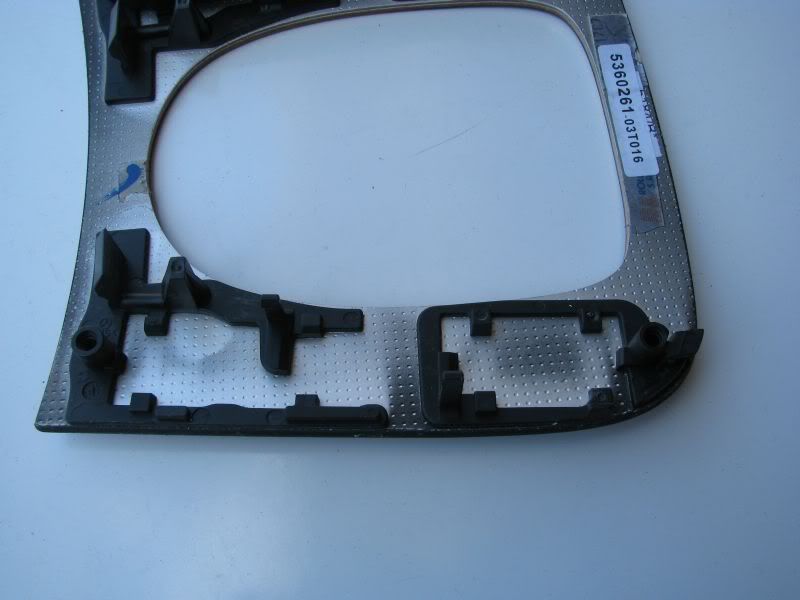
Next, slide the lid of the little compartment at the front of the console forward. You have to remove the floor and aft wall of the little storage compartment to remove the console. The aft wall has small tabs that snap into the main console frame, so you remove it by reaching into the area of the console you opened up by removing the wood trim pieces and pushing the aft wall of the stowage compartment toward the front of the car. The tabs are toward the top. Here's a picture of the floor and back wall removed and sitting upside down, so you can see the tabs.
Once that is done, remove the two screw which attach the console to the shifter.
Then, move the seat forward and you'll find a plug that covers a screw low on the console toward the rear. Remove the plug and remove the screws. There's one on each side of the console and the decorative plastic cap just snaps on the head of the bolt.
Next, you need to remove the rear A/C vent in the console. It is another snap in piece which comes out by moving the top edge toward the rear of the car. Some prying may help, but mine came right out by applying finger pressure toward the back of the car. Again, I have tried to show the small tabs that hold it in place.
Once it is out, remove the piece that is right below it. It lifts up and out and may have a couple wiring harnesses taped to it, depending on your cell phone installation. There's also a two wire harness for a light inside the console. The cell phone wiring may go up into the console lid, but it all can be disconnected near the rear lower panel. Depending on your cell phone options, the wiring may be diffrent. It might be good to write yourself a note with how many wires there are and where they go. Once the wiring is disconnected, you should be able to lift the rear of the console and the whole thing will come right out. So much for the easy part.
At this point, the shifter is sitting there looking like only three screws need to be removed and it is out. Not quite. Up to this point, it does not matter if the ignition has been turned on. But from what I've read, if the ignition is turned on while the wiring harness to the shifter is disconnected, it will set a trouble code. So, there is an easy fix. If you can get it out of park, set the parking brake and move it into neutral. Turn the key off as far as you can. You won't be able to remove the key, but the ignition is off. There are one or two harnesses that plug into the shifter, depending on if you have Keyless go. They have the same tiny tab that needs to be depressed, so press on the tab and disconnect them. All of the harnesses are different sizes and shapes, so you can't mix them up. The shifter is held in with three socket head caps screws. The rear two are hidden by the black "Y" shaped A/C duct that runs under a very large plate, making it impossible to remove. Why? Who knows? I simply pried the ductwork to the side and removed the screws. And then there is the front screw. You'll notice that it is nicely accessible except for a 1/4 inch diameter pin and clip sticking out of the front of the shifter. I can only guess it is there to slow down car thieves, as if any one who is that deeply into the car will be slowed down by it. If your car is stuck in park, it is going to take a ball ended Allen wrench to remove it, since if the shifter is in park, you can't get it out of the way. Some people have had luck with a torx driver bit stuck in at an angle. Getting that screw out can be a challenge! Anyway, to the right of the screw is the ignition interlock cable. It is clipped into the A/C duct and disappears into the front of the shifter. But simply rotate it a quarter turn toward the passenger seat and it comes right out. That leaves only the pin and the clip. The clip will pry off easily and the pin then slide far enough into the shifter housing that you can get the bolt out. It won't go anywhere or get lost, so remove the clip and get it out of your way. Remove the forward screw and the shifter should then be loose
Because of image limitations by the website, the process continues in the next thread


")


