

Find the thread that shows removal/cleaning of the duovalve. If you find a broken valve/stem, here's your fix.
DIY scale, 1-10? 5
Tools needed:
Drill
1/8th inch bit
Pop rivet gun
1/8th inch rivets with small seats. 3/16-1/2 inch grip range. Aluminum!
Dremel (or similar) with bits and cut-off wheels
Vice
Patience!
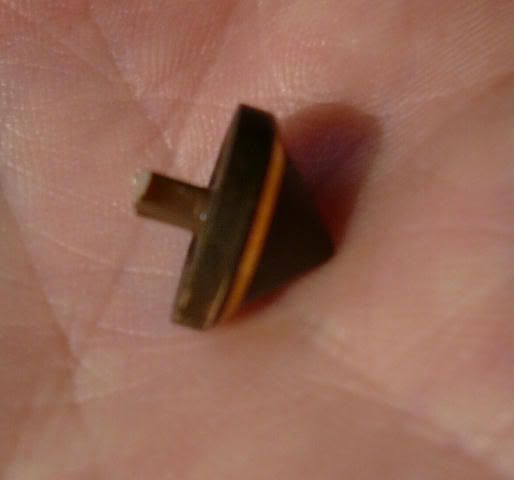
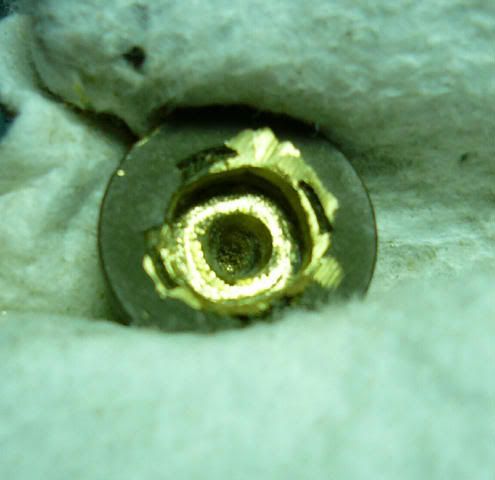
I took my valve apart to find this. . .
![Image]()
Problem is the valve stem is plastic and MB wants big bucks to replace the whole duovalve assembly for a 1 cent part!!!!!!!!!!
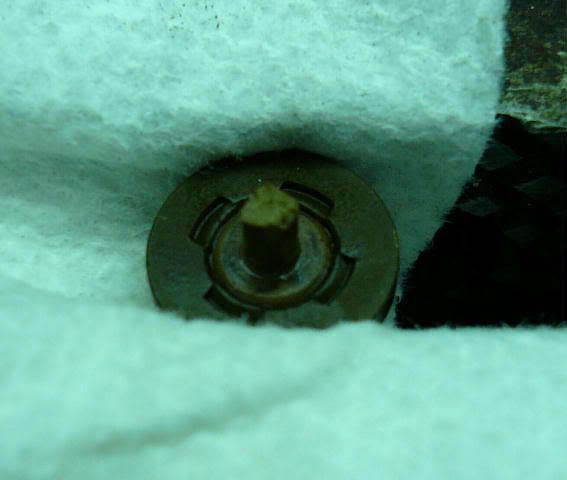
Carefully put the broken part in the vice with something to prevent marring the valve. It's soft brass. The only part you don't want to damage is the valve seat, this is the shiny ring around the base of the valve.
![Image]()
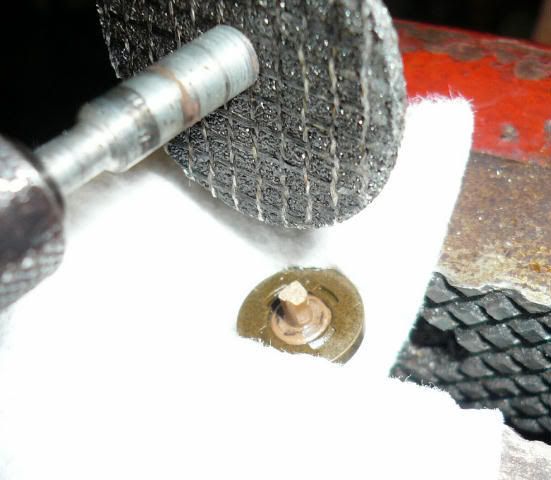
Grab the dremel and cut-off wheel and cut off the remaining stem. . .
![Image]()
This is what you want. . .
![Image]()
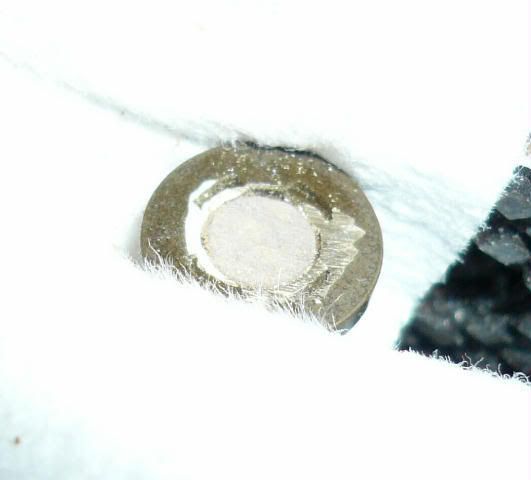
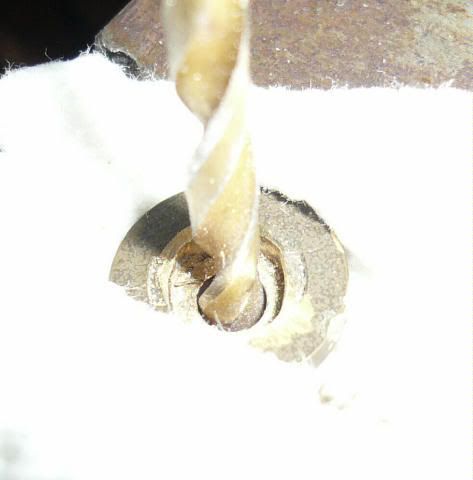
Next, put the pointed wood carving bit in the dremel and remove the plastic carefully from the vavle. . .
![Image]()
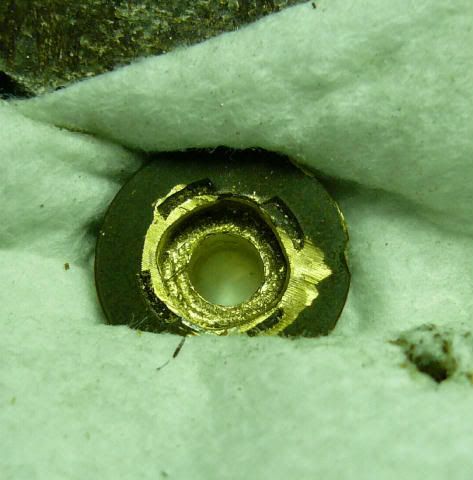
This is what you want as a result. . .
![Image]()
Next, grab your drill and a 1/8 inch bit and drill a hole down the center of the valve. Be as careful as you can to drill straight!! After you break through, rotate the drill around to "hog out" the hole a little. Think of it as making a hole the shape of an hourglass. This allows the valve to move on the rivet for better sealing.
![Image]()
This is what you should get. . .
![Image]()
Place the rivet into the valve, make sure it has a little freeplay by rotating the top of the rivet around in a circle. If it doesn't, "hog it out" a little more.
![Image]()
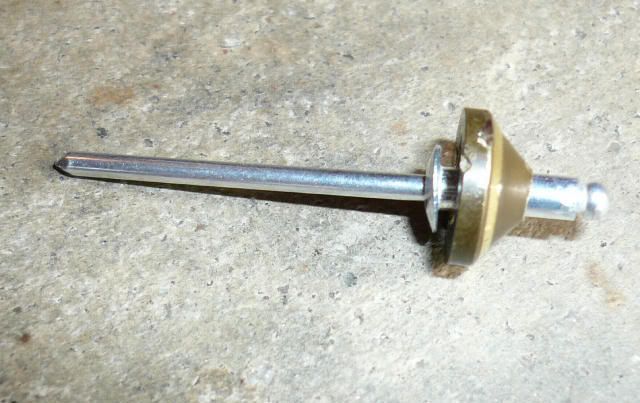
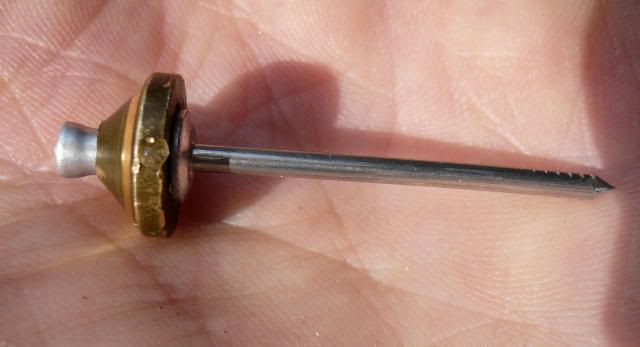
Insert the rivet gun onto the rivet. Pull it just enough to hold the valve without "popping" it. When you pull the rivet, you're pulling the larger head through the hollow stem of the rivet. This expands the stem and holds it in place. What you want to do is pull it through just enough to expand the stem just below the valve. The valve should have a little freeplay so it can move on the rivet.
Note how the end of the rivet is not expanded all the way to the valve! It's starting to look like something! Do not pop the rivet, it's your new valve stem!
![Image]()
Go to page 2 as I could only post 10 images.
DIY scale, 1-10? 5
Tools needed:
Drill
1/8th inch bit
Pop rivet gun
1/8th inch rivets with small seats. 3/16-1/2 inch grip range. Aluminum!
Dremel (or similar) with bits and cut-off wheels
Vice
Patience!
I took my valve apart to find this. . .
Problem is the valve stem is plastic and MB wants big bucks to replace the whole duovalve assembly for a 1 cent part!!!!!!!!!!
Carefully put the broken part in the vice with something to prevent marring the valve. It's soft brass. The only part you don't want to damage is the valve seat, this is the shiny ring around the base of the valve.
Grab the dremel and cut-off wheel and cut off the remaining stem. . .
This is what you want. . .
Next, put the pointed wood carving bit in the dremel and remove the plastic carefully from the vavle. . .

This is what you want as a result. . .
Next, grab your drill and a 1/8 inch bit and drill a hole down the center of the valve. Be as careful as you can to drill straight!! After you break through, rotate the drill around to "hog out" the hole a little. Think of it as making a hole the shape of an hourglass. This allows the valve to move on the rivet for better sealing.
This is what you should get. . .
Place the rivet into the valve, make sure it has a little freeplay by rotating the top of the rivet around in a circle. If it doesn't, "hog it out" a little more.
Insert the rivet gun onto the rivet. Pull it just enough to hold the valve without "popping" it. When you pull the rivet, you're pulling the larger head through the hollow stem of the rivet. This expands the stem and holds it in place. What you want to do is pull it through just enough to expand the stem just below the valve. The valve should have a little freeplay so it can move on the rivet.
Note how the end of the rivet is not expanded all the way to the valve! It's starting to look like something! Do not pop the rivet, it's your new valve stem!
Go to page 2 as I could only post 10 images.


")


