

I promised this a few weeks ago--sorry for the delay.
Mercedes-Benz W210 E-Class rear window regulator replacement (as performed on a 1999 E320 wagon--left rear door)
Replacement part #: MBZ081245
Source: www.stopshopanddrive.com ($46)
Tools needed:
-Basic manual rivet gun
-4 aluminum rivets
OR
-Heavy-duty rivet gun
-4 steel rivets (OE P/N: 003 990 24 97)
-Phillips screwdriver
-Medium Torx screwdrivers
-Trim pry tool or flat head screwdriver (w/ tip covered in tape)
-Drill (at least 14.4v cordless, or corded recommended)
-Series of small-med bits (for metal or all-purpose)
-Automotive Goop or other tacky adhesive
Background and Instructions:
You're driving along one day, minding your own business. You try to roll down the window--probably the rear window--only to hear a horrendous clunking, grinding, and snapping sound.
Hopefully your window is still suspended in its track, but it also might have fallen into the door panel.
What now?
Chances are you just experienced the all-too-common window regulator failure. Thanks to the bean counters,
M-B's vendors obviously cut a few corners in producing this fine car. Luckily, this one is not too tough
to fix for anyone with decent mechanical ability (harder than an oil change, but easier than a brake job). The regulator is just a fancy name for the channel & pulley system that guide the window's path. The motor is attached to the regulator, but is rarely the culprit with W210 window problems.
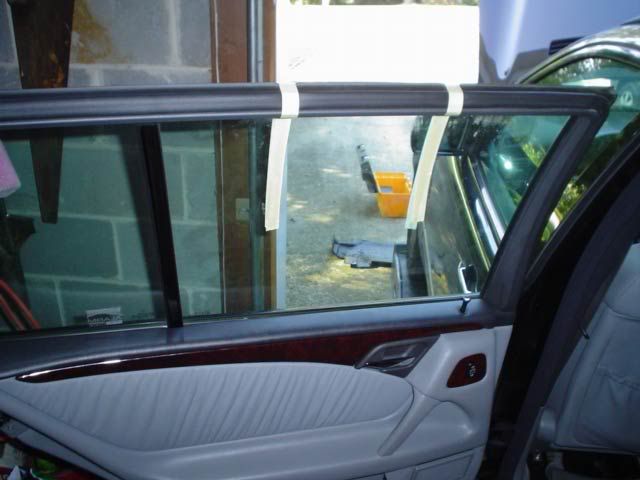
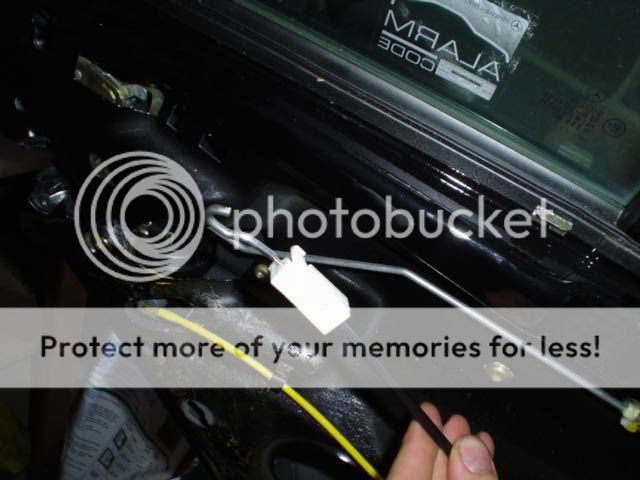
The first thing you have to do is tape the window in the up position, like so:
![Image]()
Now let's start the door panel removal by removing three simple phillips-head screws. The first one is accessed by gently prying the door handle liner away from the door. Set it aside.
![Image]()
The second one is behind a round cap in the middle of the door. Set the cap and screw aside.
![Image]()
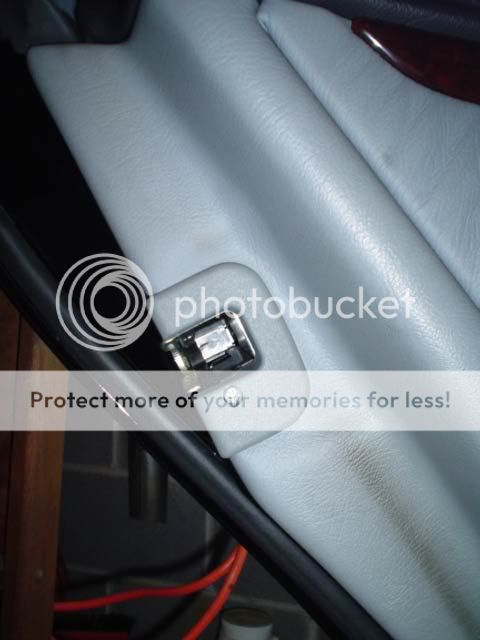
The final one holds the door latch frame onto the panel. Set the frame and screw aside.
![Image]()
Now it's time to work the panel loose from the metal door. Take your pry tool or screwdriver and gently work around the outside of the door. The attachment points are pretty obvious, since they are the points where the panel is held on especially tightly.
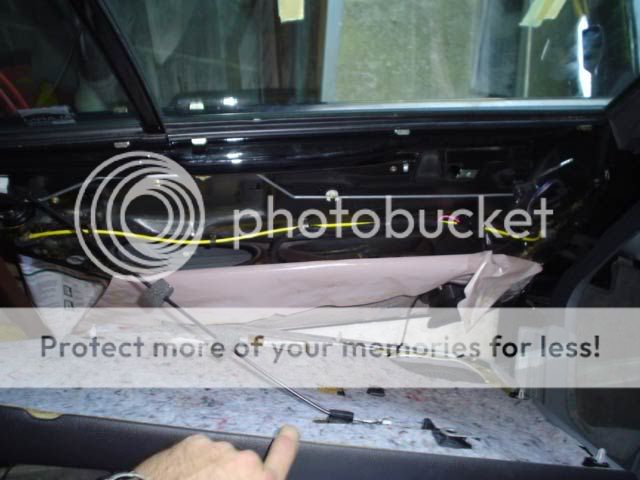
Just work your tool in and either pry or twist slightly. You'll hear the ribbed fasteners pop out easily. It's not uncommon to break a couple of these along the way, but you can find cheap, better-than-OE replacements at home improvement stores. When the panel comes free, you'll see this:
![Image]()
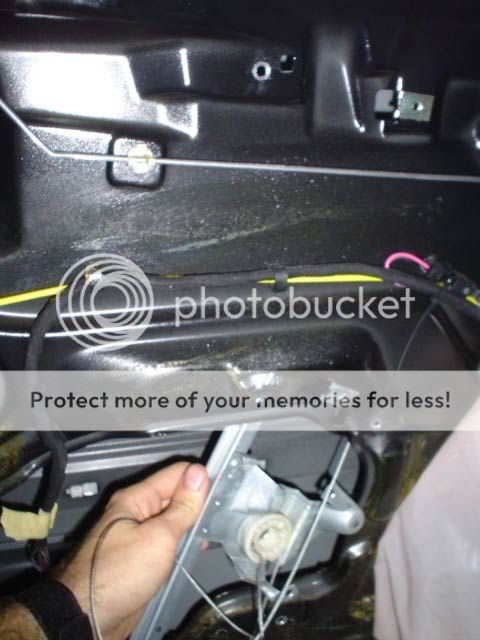
You'll need to first unplug the wiring harness that connects to the window button. Then, pull the door handle and work the cable hook free from the latch mechanism. You'll have to snap the white guide piece free to allow the door panel to pull away:
![Image]()
The speaker will remain connected, but you'll still have enough slack that you can now set the door panel in the car seat footwell and begin working.
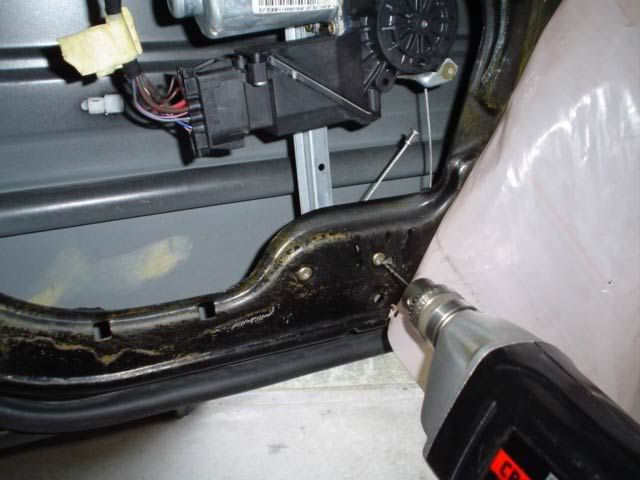
Peel back the moisture seal (plastic sheet) to the speaker area so you'll have free access to the inner shell of the door. At this point, pick a small drill bit (like 1/16") and start drilling out the bottom two rivets.
![Image]()
The way it works is that you'll move up a few fractions of an inch on each bit, until eventually the rivet will fall apart into two pieces. No more rivets, just holes:
![Image]()
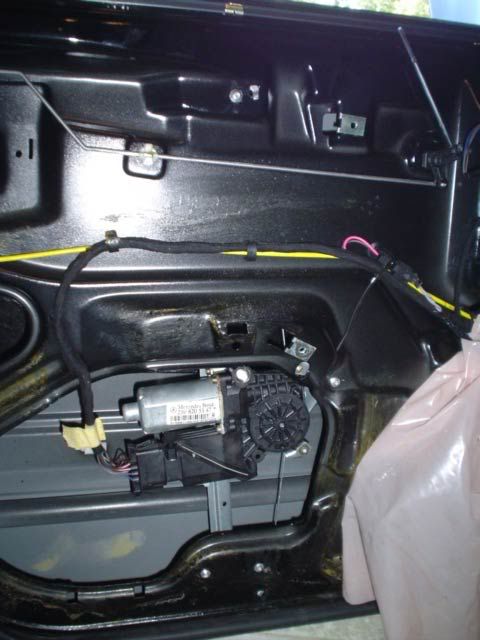
Do the same process with the top two rivets and the entire regulator and motor will come out in a single piece. Make sure you unplug the motor's wiring harness before you pull the assembly out of the door.
![Image]()
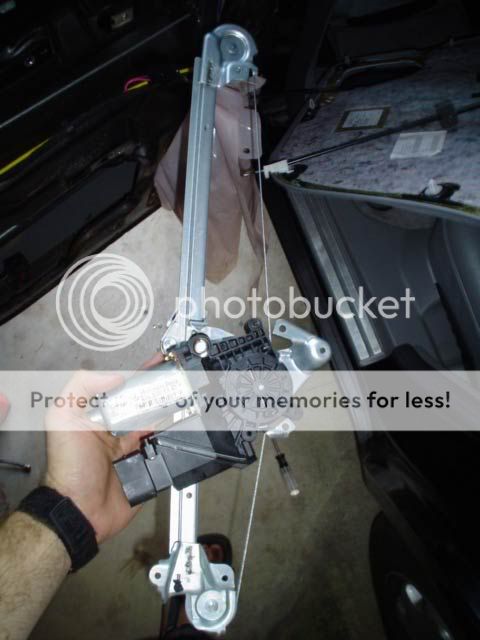
Remove the 2-3 torx screws holding the motor to the regulator. Swivel the motor out of it's spot and rotate it into place in the new regulator. It has a toothed cog that you have to line up. You'll know it's right when you feel it--a very secure connection.
Replace the torx screws.
![Image]()
Be sure you've removed all the broken junk from the bottom of the door shell unless you want it rattling around in there. Now remove the tape from the window and pull it down until you can access the rail that holds the glass. Position the new regulator so that it
slides neatly onto that metal rail. You will have to remove a small tension clip to make this attachment, and that same tension clip will then allow the regulator to stay centered on the window rail. It's hard to explain, but it's pretty obvious when you do it.
Now you're ready to put in your new rivets. Align the regulator with the old rivet holes and pop the new rivets into place. I started with OE steel rivets, but they were way too long and beefy for my basic rivet gun. I used the aluminum ones, and they seemed to make a solid enough connection.
![Image]()
Now hook the motor back up and we need to re-adapt the window. With the ignition key in the 2nd position, move the window up (to the stop) and hold for 5 seconds. Do the same with the down position. Your motor should now "know" the new full-up and full-down points.
Reseal the moisture guard with Goop, replace the latch cable, hook the window switch back up, and replace the door panel. Remember, the panel hooks over the top of the clips in the window seal area, then just push around the outside to snap it into place. Replace those three original screws, along with the pieces removed during access, and you're good to go!
Happy DIY
Ash (ashman78)
Mercedes-Benz W210 E-Class rear window regulator replacement (as performed on a 1999 E320 wagon--left rear door)
Replacement part #: MBZ081245
Source: www.stopshopanddrive.com ($46)
Tools needed:
-Basic manual rivet gun
-4 aluminum rivets
OR
-Heavy-duty rivet gun
-4 steel rivets (OE P/N: 003 990 24 97)
-Phillips screwdriver
-Medium Torx screwdrivers
-Trim pry tool or flat head screwdriver (w/ tip covered in tape)
-Drill (at least 14.4v cordless, or corded recommended)
-Series of small-med bits (for metal or all-purpose)
-Automotive Goop or other tacky adhesive
Background and Instructions:
You're driving along one day, minding your own business. You try to roll down the window--probably the rear window--only to hear a horrendous clunking, grinding, and snapping sound.
Hopefully your window is still suspended in its track, but it also might have fallen into the door panel.
What now?
Chances are you just experienced the all-too-common window regulator failure. Thanks to the bean counters,
M-B's vendors obviously cut a few corners in producing this fine car. Luckily, this one is not too tough
to fix for anyone with decent mechanical ability (harder than an oil change, but easier than a brake job). The regulator is just a fancy name for the channel & pulley system that guide the window's path. The motor is attached to the regulator, but is rarely the culprit with W210 window problems.
The first thing you have to do is tape the window in the up position, like so:
Now let's start the door panel removal by removing three simple phillips-head screws. The first one is accessed by gently prying the door handle liner away from the door. Set it aside.
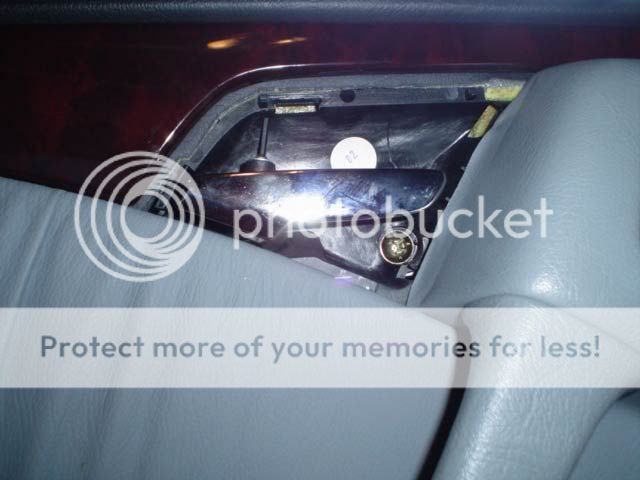
The second one is behind a round cap in the middle of the door. Set the cap and screw aside.

The final one holds the door latch frame onto the panel. Set the frame and screw aside.
Now it's time to work the panel loose from the metal door. Take your pry tool or screwdriver and gently work around the outside of the door. The attachment points are pretty obvious, since they are the points where the panel is held on especially tightly.
Just work your tool in and either pry or twist slightly. You'll hear the ribbed fasteners pop out easily. It's not uncommon to break a couple of these along the way, but you can find cheap, better-than-OE replacements at home improvement stores. When the panel comes free, you'll see this:
You'll need to first unplug the wiring harness that connects to the window button. Then, pull the door handle and work the cable hook free from the latch mechanism. You'll have to snap the white guide piece free to allow the door panel to pull away:
The speaker will remain connected, but you'll still have enough slack that you can now set the door panel in the car seat footwell and begin working.
Peel back the moisture seal (plastic sheet) to the speaker area so you'll have free access to the inner shell of the door. At this point, pick a small drill bit (like 1/16") and start drilling out the bottom two rivets.
The way it works is that you'll move up a few fractions of an inch on each bit, until eventually the rivet will fall apart into two pieces. No more rivets, just holes:
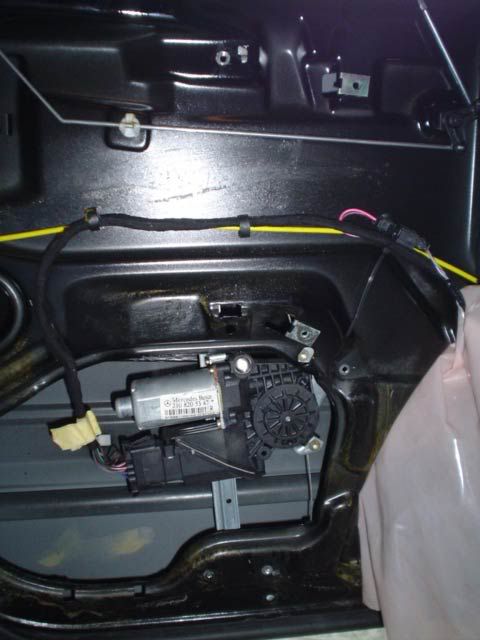
Do the same process with the top two rivets and the entire regulator and motor will come out in a single piece. Make sure you unplug the motor's wiring harness before you pull the assembly out of the door.
Remove the 2-3 torx screws holding the motor to the regulator. Swivel the motor out of it's spot and rotate it into place in the new regulator. It has a toothed cog that you have to line up. You'll know it's right when you feel it--a very secure connection.
Replace the torx screws.
Be sure you've removed all the broken junk from the bottom of the door shell unless you want it rattling around in there. Now remove the tape from the window and pull it down until you can access the rail that holds the glass. Position the new regulator so that it
slides neatly onto that metal rail. You will have to remove a small tension clip to make this attachment, and that same tension clip will then allow the regulator to stay centered on the window rail. It's hard to explain, but it's pretty obvious when you do it.
Now you're ready to put in your new rivets. Align the regulator with the old rivet holes and pop the new rivets into place. I started with OE steel rivets, but they were way too long and beefy for my basic rivet gun. I used the aluminum ones, and they seemed to make a solid enough connection.
Now hook the motor back up and we need to re-adapt the window. With the ignition key in the 2nd position, move the window up (to the stop) and hold for 5 seconds. Do the same with the down position. Your motor should now "know" the new full-up and full-down points.
Reseal the moisture guard with Goop, replace the latch cable, hook the window switch back up, and replace the door panel. Remember, the panel hooks over the top of the clips in the window seal area, then just push around the outside to snap it into place. Replace those three original screws, along with the pieces removed during access, and you're good to go!
Happy DIY
Ash (ashman78)
")


